How to Cure Shingles in 3 Days: Relieve Pain & Get Rid of Rash Fast

0

Shingles is a rash that usually appears on the back, chest, or face and sometimes around the eyes. The condition in many cases is very painful, and if proper care is not taken, it can cause a secondary infection or have adverse long-term side-effects.

In this article, learn how to relieve pain and get rid of the shingle rash fast in 3 days.

Is there a cure for shingles?

There is no known vaccine to treat people infected with shingles. However, there is a live zoster vaccine to help prevent shingles.  The live zoster vaccine, which is being marketed under the name Zostavax was approved in the year 2006 by the U.S Food and Drug Administration.

The vaccine is recommended for both young adults and elderly people below the age of 60 years and is supposed to be administered whether a person has been infected by shingles before or not.

In several clinical trials and study cases, the vaccine has been found to reduce the chances of shingles infection by half, especially in reducing the risks of postherpetic pain that ceases to go away after shingles has disappeared.

How to cure shingles in 3 days

If you want to cure your shingles quickly without much so much struggle, you must activate your body to fight the virus varicella Zoster in the below discussed two ways:

  • Use anti-itching and anti-inflammatory medications such as lotions and creams outside the skin; this will facilitate healing from outside the skin.
  • Make regular consumption of essential nutrients such as minerals, vitamins, and enzyme supplements that will help to strengthen your body’s immune system. A strong body immune system will be able to destroy the shingles virus varicella-zoster.

How to relieve shingles pain fast

Shingles is an infection that will naturally go away on its own. Still, health professionals may prescribe antiviral drugs and over-the-counter painkillers to get rid of the pain and soothe the affected area.

Treatment of shingles can last from several weeks to a month, depending on the individual’s immunity strength and age. In many cases, the elderly tend to take many weeks to heal. The commonly prescribed medication may include any combination of the following:

Antiviral Medications

Antiviral medications, especially if taken within 72 hours of having symptoms, can help to prevent the single rash from becoming bigger and lower the chances of secondary infections or complications. In many cases, your doctor might prescribe the following antiviral medications:

  • Famciclovir
  • Acyclovir
  • Valacyclovir

Pain Killers

Shingles is usually accompanied by symptoms such as pain, itchiness, and inflammation. In many cases, to relieve these symptoms, your doctor may prescribe over-the-counter medications to relieve the discomfort. Some of the painkillers that may be prescribed include:

  • Naproxen
  • Acetaminophen
  • Ibuprofen

Topical Treatment

Topical lotions and creams containing capsaicin (an active ingredient in pepper) may help ease shingles pain such topical products include lidocaine which comes in different forms such as sprays and patches.

Nerve Blocks/ numbing agent

Injectable medicines that contain numbing agents may be used when oral painkillers such as ibuprofen and Naproxen fail to provide relief from intense pain and inflammation.

Antidepressants

Over-the-counter antidepressant drugs such as amitriptyline may be prescribed by the doctor to get rid of shingles pain or postherpetic neuralgia.

Anticonvulsants

Anticonvulsants are medicines that are used to prevent seizures and treat nerve pain that persist after all the symptoms of shingles have been treated; such medication may include Neurontin and Lyrica.

Opioids

Strong opioid medications such as morphine can be prescribed by your doctor to be used for a shorter period to get rid of severe pain associated with shingles, especially in people suffering from postherpetic neuralgia.

Is it contagious?

Many studies have indicated that you cannot get shingles from other people infected by shingles and that you can only have shingles if you have been infected by Chickenpox before. However, it is important to know the answer to the following. Is shingles contagious? The answer is yes: people with active shingles infection are contagious. Yes, they spread Chickenpox to other people.

Both singles and Chickenpox are caused by a virus known as the Varicella Zoster virus, which is spread when one comes into direct contact with blood or fluids from a wound or from blisters on the skin of individuals with shingles. What this means is that if you have never been infected with Chickenpox in your lifetime, you can get it from a person with shingles.

It is important to note that shingles isn’t infectious until wounds, sores, or blisters appear. And it ceases to be contagious the time blisters or sores or wounds form a crust, though recovery of these wounds, sores or blisters can take more than 1 week.

In many cases, special preventative measures can lower the risk of spreading Chickenpox from people with active shingles. It is advisable if you have active shingles to cover the blisters, sores, or wounds with a non-stick dressing and avoiding scratching and touching your sore and blisters. Also, you need to wash your hands frequently to prevent the spreading of the Varicella zoster virus.

According to the U.S Centers for Disease Control and Prevention (CDC), individuals with active shingles need to stay away from individuals who have never been infected by Chickenpox or individuals who have never been vaccinated against Chickenpox. Also, CDC advises getting vaccinated against Chickenpox and shingles to reduce the risk of getting the varicella zoster virus.

Other individuals CDC advocates to stay away from individuals infected with shingles and Chickenpox include pregnant women, individuals undergoing chemotherapy, individuals with a compromised immune system, and individuals on immune-suppressing prescriptions, organ transplant recipients, and individuals with HIV/AIDS.

Quick natural home remedies

Home remedies are effective cures, especially in the management of symptoms of shingles. There are more than 50 home remedies that can be used in getting rid of shingles, below are the best 10 time-tested remedies that can produce effective results when used. Consider the following:

TEA TREE OIL

Tea tree oil has ingredients with antibacterial and antiviral properties; hence when used topically, it can cure disorders such as pimples, warts, dermatitis, rashes, ringworm, and rough plaques on the skin.

To use tea tree oil for shingles:

  1. Mix 2 tablespoon of tea tree oil with 1 tablespoon of castor oil.
  2. Dip a cotton ball into this solution and apply it over shingle infected area.
  3. Let the remedy stay for 3o minutes before rinsing it off with lukewarm water.
  4. You can add a few drops of rosemary to the lukewarm water. It will work as a natural cleanser.
  5. Practice this remedy 2 to 3 times a day till the shingle symptoms fade away

We highly recommend Essential Oil Labs Tea Tree Oil (Check price on Amazon)

OATMEAL PASTE

Oatmeal has a soothing effect on shingles, and it gives instant relief from irritation caused by itching. Also, when oatmeal is used as a remedy, it helps to speed up the healing process of the shingles.

To prepare oatmeal paste:

  1. Take 3 cups of oatmeal and grind them into a fine powder.
  2. Add some water to the powder to make a thick paste.
  3. Gently apply the paste to the areas that have been affected by shingles.
  4. Allow the paste to dry and let it sit for 1 hour.
  5. Repeat the process 2 times a day, at least for 1 week.

VIRGIN COCONUT OIL

Virgin oil is effective in getting rid of the symptoms of shingles

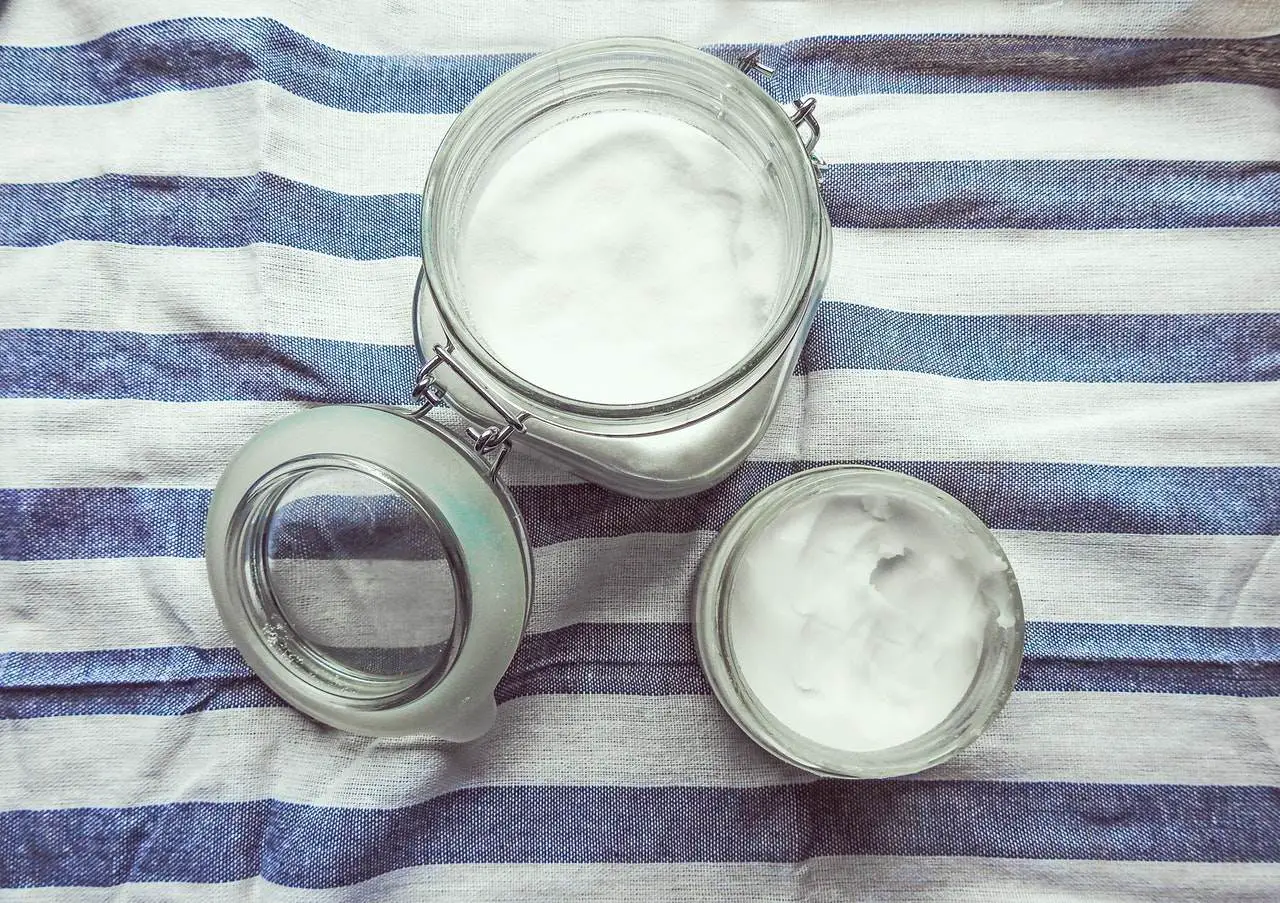
Virgin oil has antibacterial and anti-inflammatory properties that make it effective in getting rid of the symptoms of shingles, such as swelling, pain, itching, and inflammation. Coconut oil also has a rejuvenating skin effect that helps the skin to regain its original tone after repeated applications.

To use coconut oil:

  1. Take 3 tablespoons of virgin coconut oil and warm it gently in case it is in a viscous state.
  2. Dip a cotton ball into this solution and apply it on the areas affected by shingles.
  3. Let it sit for 60 minutes before rinsing it off with lukewarm water.
  4. You can add a few drops of rosemary to the lukewarm water. Rosemary acts as a natural cleanser.
  5. Repeat this process 2 times a day until shingle symptoms go away.

TURMERIC AND NEEM

Turmeric has antibacterial, anti-inflammatory, and anti0xidant properties that help to get rid of symptoms associated with shingles. Also, turmeric prevents the skin from dehydration and dryness. On the other hand, neem has ingredients such as nimbidol and edumin, which have powerful antifungal properties that help to cure shingles and its accompanying symptoms.

To use Neem and Turmeric:

  1. Take a handful of Neem leaves and grind them into a smooth paste.
  2. Add 3 tablespoons of organic turmeric to this paste and mix thoroughly.
  3. Allow the mixture to sit for 5 minutes then apply it on the areas affected by shingles.
  4. Repeat the process twice a day for a week.

APPLE CIDER VINEGAR (ACV)

Apple cider vinegar (ACV), when used to get rid of shingles it acts as an antiseptic agent that protects the skin from further decaying in the severe cases of shingles.  ACV also has soothing and anti-microbial properties that provide curative effects on blisters caused by shingles attack. Several studies have indicated that Apple cider vinegar (ACV) astringent, and thus when used to treat shingles, it helps to get rid of intense burning sensation and the pain almost instantly.

To use apple cider vinegar (ACV):

  1. Take 4 tablespoons of undiluted Apple cider vinegar (ACV) and add them to the glass.
  2. Dip a cotton ball into the apple cider vinegar and gently apply on the shingle blisters and rashes.
  3. Repeat the process 3 times a day for one week.

ALOE VERA AND CAYENNE PEPPER

Aloe Vera helps to heal the blisters and sores caused due to shingle’s damage

Aloe Vera has curative antifungal and anti-microbial properties that help to heal the blisters and sores caused due to shingle’s damage. Cayenne paper, on the other hand, has high contents of a compound called capsaicin, which helps get rid of pains, itching, and inflammation and prevents the infected area from further infections.

To use aloe Vera:

  1. Take a fresh aloe Vera leaf plant, cut it open and extract the gel.
  2. Take 2 to 3 teaspoons of cayenne pepper powder and mix it with the gel.
  3. You can also add 2 tablespoons of organic turmeric and gently apply the paste on the blisters.
  4. Repeat this application 2 times daily for 1 week.

You can also use organic cold-pressed Aloe Vera (Check price on Amazon)

GARLIC

Garlic has antiseptic, anti-microbial, anti-inflammatory properties that help heal the blisters and rejuvenate the skin. It also has antifungal compounds that make it very effective in getting rid of shingles. Garlic can also be consumed orally as it helps to boost the immune system and fight infections from within.

To use garlic:

  1. Take 2 garlic onions, peel of the skin, and then grind the garlic into a paste.
  2. Apply the paste to the blisters.
  3. Let it sit for 20 minutes and then wash off the area with lukewarm water.
  4. You can add a few drops of rosemary water to lukewarm water. Rosemary water acts as a natural cleanser.
  5. Repeat the process twice a day, at least for a week.

ORGANIC HONEY

Honey is a natural home remedy that is universally acclaimed for its ability to deal with various skin ailments. It has antibacterial, antifungal, anti-microbial properties that make it effective in healing shingle blisters and in removing the ugly scars from the shingle-damaged skin. Honey has a soothing effect on the skin, a factor that helps in getting rid of burning sensation, itchiness, and dryness.

To use honey:

  1. Take 3 tablespoons of raw organic honey and add it in a glass of water.
  2. Dip a cotton ball in this honey and apply it to the shingle affected area.
  3. Cover the affected area and let the honey sit for more than 45 minutes.
  4. Then, rinse off the honey from the affected area with lukewarm water.
  5. You can add a few drops of rosemary water to lukewarm water. Rosemary water is a natural cleanser.
  6. Repeat this application 3 times a day for 1 week.

REFERENCES:

  1. https://www.webmd.com/skin-problems-and-treatments/shingles/ss/slideshow-shingles-pictures
  2. https://www.add.org/public/diseases/contagious-skin-diseases/shingles

Infected Nipple Piercing: Signs (Pus, Bump) & How to Clean, Treat It

0

Body piercings need proper care for them to heal successfully. If the piercer does not adhere to appropriate hygiene standards when making the piercing, you can easily end up with an infection. A nipple piercing infection can easily turn nasty with signs such as pus oozing from it, pain, and bad odor.

To reduce the risk of infection, you must practice proper aftercare. By this, we mean cleaning it, treating, and even wearing the right kind of jewelry to prevent rejection. The breast area has a heavy network of ducts and other sensitive tissues that make it susceptible to infections and other complications. The very important part of taking care of a nipple piercing is being able to know if it is getting an infection.

How do I know my piercing is infected?

It is normal to experience some level of pain immediately after the procedure. However, the pain should reduce after a couple of days. If it lasts longer than a few days, it is likely to develop a complication or infection. This is where you need to take the right mitigation measures to help the infection heal and go away.

It is normal to experience some kind of inflammation and soreness. The nipple will be red and painful to touch up to a few hours after the piercing procedure. Although a little itching may also be experienced, it should not be severe or too much. Just avoid scratching or touching it to avoid an infection.

However, if there is persistent pain, soreness, and inflammation, that is how you know your nipple piercing is getting infected. There may be more signs to look out for.

Signs of a nipple piercing infection

Yes, nipple piercings are risky because of the deep breast tissue as well as a network of ducts. The chances of getting infected are high. The pain level is also high because, well, we are talking about breasts and nipples here. So, the sure symptoms your piercing is irritated and infected.

Redness

Redness is normal, but it should only occur a few hours to a few days after the piercing. It is a natural reaction to the interruption of your normal body tissue and blood vessels. However, irritation that lasts more than one and a half weeks is a sign that the piercing could be developing an infection.

Consider the piercing as a wound that is healing. The natural inflammatory process that helps speed up healing results in redness. It should, however, last 5 to 7 days. If it lasts long and continues to worsen, that could be a sign of infection on the wound around your breast.[1]

Pus drainage

It is quite normal to have a little fluid draining from a fresh piercing. However, it should be clear or slightly yellow. It is also reasonable to see a slightly blood-tinged fluid in the first 48 hours. According to Joshua Zuckerman MD, FACS, a board-certified plastic surgeon in Manhattan who specializes in breast reconstruction, “The piercing creates a small wound that, like all wounds, will produce a small amount of drainage in the initial phase of healing.” [2]

Malodorous drainage appears as white or green pus. It can be cloudy and produces a foul odor. If the normal drainage turns into characteristically infected pus, you should see a doctor as soon as possible. If it is normal and you are less likely to be having an infected nipple piercing, use absorbent dressings used for wound care such as hydrocolloids to reduce the pus discomfort.

Bump on nipple

Some sort of bumps form on or near infected nipple piercings

Some sort of ‘bumps’ form on or near infected piercings. They are common on earlobes, cartilage, and nose piercings. Depending on the cause, the bumps can be follicular cysts, abscesses, or keloids. If you can determine the particular cause and type of bump you have on your nipple, it will be easier to get rid of it and heal the nipple piercing infection.

For most infections on the nipple, the common symptom is an abscess. It may resemble a subareolar breast abscess and presents as a swollen bump on the nipple area filled with pus (dead white blood cells.) The AARP website points out that nipple bumps and abscesses are commonly caused by piercings, smoking, and diabetes[3]. When present, it is a sure sign that there is a local infection that needs to be treated or checked by a doctor.

Swelling

Swelling is part of the normal healing process of a wound. It is the initial stage of inflammation and white blood cell activity. Swelling should be continually decreasing.

Redness, the hotness (warmth), and swelling that lasts for more than 3 days and keeps getting worse is a symptom of infection on the nipple piercing. The main symptoms of inflammation to look for are heat, redness, swelling, and pain.

Pain and fever

Fever, pain, head, and body aches are general signs of wound infection. A low-grade fever that accompanies the other signs and symptoms discussed above will also help you know that you have an infection.

For this, your doctor may give you a painkiller and treat the wound with an antibiotic to fight the infection. A nipple piercing pain can really be excruciating if the infection is severe and has spread through your blood. Make sure you see a doctor early enough before it turns into a systemic infection.

Causes

Usually, the reason for the infection starts with the piercer. If the procedure was not carried out properly, you might develop a problem before the wound heals completely. Keep in mind that this kind of piercing can take up to 1 year to heal. Here are the possible causes of infection.

  • Unhygienic piercing tools. To prevent such problems, sterilized tools must be used.
  • Frequently touching the nipple after the procedure. This usually introduces bacteria to the area.
  • Wearing tight clothes that irritate the location, causing inflammation.
  • Poor quality jewelry. Some materials such as nickel are known to irritate skin tissue and increase the risk of infection.
  • Some soaps can also cause an infection.

To prevent infections, ensure that your piercer uses clean, sterilized equipment to perform the procedure. If you need to clean the area, wash your hands clean before touching the area to prevent transferring germs to the location.

Risk factors you should consider

It is important to consider that when you get body piercings, you are exposing yourself to a certain degree of risk. Common risk factors that may come with a nipple piercing infection include the following:

  • Nerve damage
  • Permanent scars
  • Keloid bumps
  • Breastfeeding problems
  • Bleeding that may occur intermittently
  • Tearing of breast tissue

Self-diagnosis is crucial because it will help heal the pierced nipple faster. The symptoms above should help you know if you have an infection. If you are not sure if the symptoms are a serious sign or just the healing process, consult your doctor for proper diagnosis. Taking too long will allow the disease to spread further and increase the risk of complications.

How to clean an infected nipple piercing

To prevent infections, you need to ensure the piercing is clean all the time. This does not mean you overdo the hygiene procedures. Here’s how to clean it:

  1. Wash your hands clean.
  2. Using a clean washcloth, gently clean the area with plain lukewarm water.
  3. Pat it gently to dry.

If you are going to use any kind of soap, ensure that it is meant for sensitive skin to avoid irritation. Contrary to the advice of some people, do not use ointments, detergents, harsh soaps, cleansers, and hydrogen peroxide to clean the area. These will cause further irritation and inflammation.

Aftercare tips

As it heals, the wound may go through several stages. Some stages may present discomfort such as itchiness and even bad smell. You mustn’t remove the nipple piercing jewelry. Removing it will create a hole that can accumulate fluids, pus cells, and bacteria.

  • Always ensure that your piercing is clean and dry.
  • Do not wear irritating clothes.

Bumps on nipples can easily be prevented if you try the following tips:

  • Piercing with jewelry that is not too heavy to tear tissue. Avoid jewelry that is too thick or larger than required in diameter.
  • Avoid removing the jewelry too soon before the piercing heals completely.
  • Try not to play with, stretch, or pick the piercing even if a scab forms on it.
  • Be more careful with the aftercare routine of second nipple piercings. They are the most likely to get infected.

Treatment and healing

Before and during the infection, you should avoid squeezing out any pus. This will not get rid of the infection. We recommend that you see a doctor for proper treatment that will help the infection heal faster.

Antibiotics

Your doctor will prescribe the right antibiotic to get rid of the bacterial infection on the nipple piercing. Some medications may be in the form of tablets, others topical, and in some circumstances, you may get an injection. The latter is only necessary if you have a more advanced systemic bacterial infection.

Can I use OTC topical antibiotics?

Avoid applying over-the-counter antibiotic ointments. They can form a film that traps bacteria inside the pierced area. These will only worsen your infection. If you are using a topical treatment, apply only one prescribed by your doctor.

Home remedies

For local infections that are not very serious or advanced, you can try a few home remedies that will help you relieve the pain and stop the infection from spreading.

Apply a warm compress: Apply a warm compress gently to the breast area. This will improve drainage, increase the flow of blood. Proper supply of nutrients and removal of waste products will help the infection heal faster.

Soak in sea salt: Make a solution of warm water and sea salt. Soak your nipple in this saline solution for 3 to 5 minutes. Repeat this home treatment two times a day to heal the wound faster.

Conclusion

The most important tip on preventing infections on piercings is following the aftercare instructions given by the piercing professional. Also, be patient with the wound to allow it enough time to heal. Wearing loose clothing and avoiding tight bras can help it heal faster.

References

[1] http://www.woundsource.com/blog/8-signs-wound-infection

[2] https://www.cosmopolitan.com/sex-love/a10296792/nipple-piercing-healing-infection/-

[3] http://healthtools.aarp.org/health/subareolar-abscess

Top 5 Over The Counter Fertility Drugs [Pills to Get Pregnant & Twins]

According to research conducted by the Center for Disease Control (CDC), 12% of women are struggling to conceive or carry the pregnancy to term.

Due to such fertility issues, there are a variety of prescribed fertility treatment kits. A number of such kits are seemingly expensive for a majority of women to acquire. OTC or over the counter fertility drugs and pills work equally well and are quite affordable.

So, what is the best OTC fertility drug/supplement you can buy today to help you conceive?

5 best OTC fertility drugs that work

These are medications bought at a pharmaceutical store or online without prior prescription from a doctor. There are many reasons as to why most people prefer this type of medication.

First, these formulas are available in pill form compared to those most administered by injection.

Secondly, they are readily available without the hustle of prescription from your doctor. Here are the best OTC fertility drugs and pills you can buy this year.

There are a variety of fertility medications sold without a prescription. Here are the common:

FertilAid

FertilAid

FertilAid is known to be one of the best over the counter fertility drugs on the market today, competing Clomid-based supplements fiercely. It will do two things:

  • Regulate your cycle for women who have difficulty conceiving due to irregular menstrual cycle.
  • Act as a superb prenatal vitamin, meaning you can cut your budget on those as soon as you get pregnant.

The supplement is natural and also available for men as well. According to the manufacturer, this is good for women with irregular menstrual cycles, causing infertility.

Check price on Amazon

Eu Natural CONCEPTION Fertility Prenatal Vitamins

Eu Natural CONCEPTION Fertility Prenatal Vitamins

Inconsistent cycles are the major cause of infertility in women. To make it worse, when your periods come, they are very painful. Eu Natural’s OTC fertility pills can solve that and improve the quality of your ovulation to increase your chances of conceiving.

The 100% natural supplement formula contains vital fertility boosting ingredients, including Myo-Inositol, Vitex Chaste Tree Berry, and Folate Folic Acid, etc.

While fertility pills and drugs can help you conceive even twins easily, you should be cautious about taking them, especially if you are on other medications such as those of PCOS.

You should also consult your doctor before taking these even though they are non-prescription drugs to prevent severe side effects.

Check price on Amazon

Vitex woman’s dietary supplement

Nature's Way Vitex Chaste Tree

This is yet another widely used over the counter fertility drug. It can also be referred to as chaste berry, as it of the natural extract and is ideal for those women with short luteal phase (Period after ovulation and period).

  • It also prevents miscarriages and balances reproductive hormones.
  • One can also choose to take vitex with other fertility enhancing supplements such as calcium.

Check price on Amazon

Cassanovum Original Root Extract & Folic Acid Capsules

Nature's Way Vitex Chaste Tree

Also known as folate, folic acid has great fertility benefits. Folic helps the body produce new cells. It plays a major role in the conception and also prevents the baby from suffering any tubal or brain-related congenital disabilities.

Check price on Amazon

Folate is available as an antenatal vitamin but can also be taken by women who would love to boost their fertility with an OTC fertility drug or medication.

Other options that may need prescription include:

Metformin

Also known as Glucophage, this drug is widely used by diabetic patients. It works by reducing the amount of insulin in the body. This drug can be used by women with Polycystic ovarian syndrome (PCOS) who are often insulin-resistant.

  • Additionally, metformin can be used to reduce the chances of miscarriage in women with a history of abortions and miscarriages.

It is sold as a pill of 500 milligrams. It should be taken once every day for a month. Its side effects are gastrointestinal –related. Occasionally one might experience some headache, which is normal.

Do fertility drugs work?

Fertility enhancing pills are medications that cause the body to release hormones that initiate and control the process of ovulation. Ovulation is the egg releasing process from the ovaries. The success rate depends on the drug itself.

For example, the success rate of Clomid

About 80 percent of women who take clomiphene ovulate in the first three months of treatment. Of them, 30 to 40 percent conceive by their third treatment cycle. (Source: Baby Center)

Most non-prescription pills are based on clomiphene (Clomid).

Clomid treatments (Serophene)

Popularly known as Clomid, Serophene is an estrogen antagonist. It blocks the actions of the hormone estrogen, enabling the endocrine system to produce gonadotropin-releasing hormone (GnRH).

  • Together with GnRH, luteinizing hormone and follicle-stimulating hormone are also released.
  • The primary role of these hormones is to trigger the egg-making process by the ovaries.

Clomid-based pills are by far the most popular in the market today. It is mainly used to treat infertility and sub-fertility – when you fail to conceive in the first year of trying.

Studies have shown that approximately 80% of women will start ovulating normally and significantly increase their chances of getting pregnant. Surprisingly, Clomid can also help men with fertility problems.

Clomid success rate:

80% of women on Clomid treatment will successfully ovulate and 10 to 12 percent will conceive per cycle. Therefore, the pregnancy rates are quite impressive.

Serophene is available in a dose of 50 milligrams on a prescription. You are to take a tablet each day for five days as a starting dose. Ovulation should start about a week after your last pill.

The dosage could be altered if the initial one does not work. You can take up to 150 milligrams daily for a month.

  • After ovulation, Clomid should be discontinued for about 6 months to give room for pregnancy to occur.
  • If no pregnancy occurs after 6 months, you will need to seek medical advice or try another drug.

When taking Clomid, you are likely to experience hot flashes, nausea, light-headedness, and bloating. All these symptoms are usually mild, and enough rest will make you feel better.

Additionally, Clomid may cause your vaginal mucus to thicken, hindering sperm penetration. Similarly, with such changes, you may be unable to tell your exact ovulation time.

Studies show that about 82 percent of women who use Clomid ovulate, and about 41 percent of them get pregnant. The majority of pregnancies occur from the second cycle. It is one of the best over the counter fertility drug to give a try.

Types on the market

Do OTC fertility pills for getting twins to work? There are two types of fertility-enhancing drugs, namely:

1. Oral fertility pills

These types of drugs are mostly sold over the counter. They are usually accompanied by fewer side effects to none. Common examples include vitex and Clomid.

2. Hormonal injectables

These types of drugs are taken into consideration when an oral fertility pill fails to work. They are recommended to trigger ovulation as in Polycystic Ovarian Syndrome (PCOS). The dose of such drugs varies depending on the fertility issues at hand.

  • The majority of these drugs are injected under the skin, while the rest are injected into the muscles.

The injections are usually recommended from the third day after your period. You are then to continue using them for the next 12 days. These drugs have a high success rate to help you get pregnant.

Research shows that about 50 percent of women who do not ovulate have a chance of becoming pregnant with one of the following injectables:

  • Follicle-stimulating hormone shots

These drugs work by initiating the growth of eggs in the ovaries.

  • Gonadotropin-releasing hormone injectable

These drugs trigger the release of follicle-stimulating hormone and luteinizing hormone. Both are essential for lengthening the period after ovulation and your period.

Are these pills effective?

Over the counter, drugs are effective. The only difference is that with these drugs, you do not need a doctor’s prescription to purchase them. However, you should be careful when purchasing over the counter fertility drugs.

Always check for the expiry date. If, for instance, a drug is expired, then its effectiveness is compromised. Again, take the correct dosage for better results. An underdose may not bring about the desired results.

Can I take them to have twins?

Do over the counter fertility drugs increase chances of multiples? Yes. Some women who used over the counter drugs reported conceiving multiples. Clomid, for example, when used properly, increases a woman’s chance to conceive twins by 45 percent.

Other natural fertility supplements

Heparin

Heparin is an anti-coagulant. It works to prevent blood mother-child blood coagulation, especially for those negative rhesus mothers carrying positive rhesus fetus. One of the most common causes of inter-uterine fetal death is blood coagulation.

Rhesus is a term used to mean an antigen. Women who happen to be rhesus negative may pose a danger to their fetus if they happen to be of positive Rhesus factor.

  • Heparin works to protect clamping together of the two types of blood hence reduces the chances of miscarriages.

Antagon

Also known as acetate, antagon works by preventing early ovulation. It also causes prolonged ovulation increasing a woman’s chances of conceiving. This drug has mild side effects, including a headache, abdominal pain, and nausea.

What are the risks involved?

Most of these drugs are safe to use. Studies have not shown any major risk to worry about. However, there are chances that one could conceive multiples. Multiple pregnancies are associated with complications such as prematurity and abortion.

Natural fertility remedies

Besides over the counter conventional fertility drugs, some natural remedies are quite useful in increasing fertility. Here are the best common remedies to give a try:

1. Evening Primrose oil

Primrose oil has been known for centuries to help with fertility issues. It works by improving vaginal mucus to protect the sperm during fertilization. Cervical mucus is essential in propelling the sperm to the egg, hence making it easier for fertilization to occur.

  • A tablespoon of this natural remedy once daily for about a month will increase one’s chances of becoming pregnant.

2. Red raspberry leaves

Pregnancy is impossible without implantation. Implantation is the attachment of a fertilized egg to the uterine lining, for growth and development.

Raspberry has been used for centuries to help nourish the uterine lining for proper implantation. It strengthens the uterine walls and reduces the chances of a miscarriage.

This remedy is best for those women with a prior history of miscarriages. It can be taken twice in a day. Glass in the morning on an empty stomach and another before bed.

3. Black cohosh

Black Cohosh is a natural fertility remedy suitable for developing healthy eggs. It is also available in supplement form and can cure several menstrual –cycle abnormalities.

It can be bought over the counter at an affordable price. Its side effects include nausea and diarrhea, but will be mild and fade away after 2-3 days.

In summary, here are ways to increase your chances of getting pregnant.

Getting Pregnant
How to increase your chances of getting pregnant

References

Yellow Feet at The Bottom: Meaning, Causes (Diabetes, Hard Dry Skin)

0

When feet and palms turn yellow, it could mean quite a number of health conditions. Some may be serious, while others may only pose an esthetic problem.

Yellowing of the skin at the bottom of feet is often associated with diabetes, liver problems, and calluses. However, the problem can extend to other parts of the body, mostly the palms and eyes. Toenails can also turn yellow, especially when some important vitamins are deficient. In babies, it could easily point to jaundice.

Why is the bottom of my feet yellow?

Feet bear your whole body weight. That means that they endure a lot of pressure. This often leads to various skin issues around the heels and generally at the bottom of the feet. A common observation, especially in people who use shoes with a hard insole, is a thick, discolored skin on the bottom of feet. This means that the problem is not that serious.

However, it is also possible that the yellowing is a symptom of a more serious underlying health problem that may need to be checked up.

Causes

According to the Russian Open Medical Journal, a yellowish discoloration of the palms and skin on feet is a common symptom associated with various conditions, including carotenodermia, xanthodermia, carotenemia, and hypercarotenemia. Patients may also be suffering from diabetes, thyroid disorders, and liver disease.[1]

But these are not always the reason behind the symptom. Here’s a discussion on the possible causes for discoloring the bottom of feet.

1. Calluses

Both corns and calluses can form on the skin of your feet due to the pressure exerted on them by your body. They form as a result of the thickening of the skin that overlies the bony prominence.Calluses can cause yellow feet

When they form on toes, they are called corns. These thick layers of skin can cause pain when you walk or wear tightly fitting shoes. Both corns and calluses at the bottom of the feet may be caused by wearing ill-fitting shoes.

According to Denise B. Freeman, D.P.M. of the College of Podiatric Medicine and Surgery, Des Moines University, corns and calluses present as a sign of mechanical injury to the lower extremities[2] usually occasioned by poorly fitting shoes, wearing loose socks or those whose threads irritate the bottom of feet and toes.

  • The thick layer of skin will present as white or yellow.
  • In some cases, the yellow calluses on the bottom of feet are extremely dry skin that may appear flaky.
  • Both corns and calluses are painful though the former is more painful than the latter.

This problem may be less bothersome and will only require treatment if it is an aesthetic issue. Regular exfoliation at home can help reduce the thick, discolored skin on your feet. Using moleskin pads and OTC salicylic acid callus removers can help relieve the pain and accelerate the healing process.

2. Diabetes mellitus

Although the relationship between the yellowish-red or orange skin color and blood carotene levels is controversial according to a publication in the Indian Journal of Endicrinology and Metabolism, such discoloration is sometimes evident in patients of diabetes mellitus.[3]

If you have diabetes, you are likely to notice this change in the color of your skin on palms and feet. “…it may also be associated with end products of advanced glycation.”

People who observe this discoloration are advised to see a doctor as soon as possible for proper diagnosis and treatment. Diabetes is a serious health problem that needs proper management and care.

3. Jaundice

When you have jaundice, the whites of your eyes and the skin will start yellowing. This is caused by the abnormally high bile pigment called bilirubin in the blood. Bilirubin results from the breakdown of old red blood cells to form a yellow byproduct. This condition often points to a liver problem that may need proper diagnosis and treatment.

The liver disease reduces its ability to remove and modify bilirubin for excretion. Related signs and symptoms of jaundice include:

  • Dark urine
  • Pale stool
  • Abdominal pain

The yellow pigment, when not properly excreted, will build-up in your blood and leak into the skin. If you have jaundice, you are likely to get yellow skin around your feet and other parts of the body as well.

4. Carotenodermia

The presence of a large amount of carotene in the blood can also result in the yellow discoloration of palms and feet. The excessive intake of carotene sourced in the diet is the main reason for the change in color of your heels, the bottom of feet, and palms. Excessive eating of the following foods can lead to this symptom.

  • Squash
  • Carrots
  • Sweet potatoes
  • Oranges
  • Spinach

Feeding on too many of these leads to the characteristic yellow or orange color due to the deposition of the pigment in the tissues. This problem is highly evident in babies who consume too much carrot juice.

5. Some foods

As already noted above, some foods can load your system with carotene and result in the yellowing of the skin. When this is the cause of yellow or orange skin on the bottom of feet, you may experience the same elsewhere on your body, including a yellow tongue, palms, eyes, etc.

Too many carrots or carrot juice can change the tint of your skin as well as a stool to yellow or light orange. Other than carrots, the following foods that can cause carotenemia are pepper, pumpkin, sweet potatoes, squash, and oranges.

6. Anemia

Iron is an important nutrient in the production of hemoglobin, a molecule that carries oxygen. Its deficiency can lead to “decreased oxygen delivery to the entire body and may include: Being pale or having yellow “sallow” skin.” [4]

If your symptom is being caused by anemia, you may experience other signs, including lethargy, hair loss, brittle nails, headaches, unexplained weakness, and clay or ice cravings.

Dietary remedies can help get rid of yellow feet and palms that are caused by anemia. Your doctor may advise you to include plenty of beef, pork, liver, fish, leafy green vegetables, legumes, and iron-rich pasta in your diet to remedy the problem.

Diagnosis

When you notice unusual signs such as discoloration on your feet and toenails, you must see a podiatrist for diagnosis and treatment. Foot problems can be vast, and calluses or corns can be managed with the help of a specialist.

If the problem is not restricted to the bottom of your feet only, see your general doctor for tests that will determine the cause of the symptoms. Possible tests that will be carried out include:

  • Beta-carotene levels test
  • Bilirubin test
  • Liver function tests
  • Blood count
  • Tests for fungal infections

Your doctor may interview you to determine if your diet is the possible cause of the discoloration of your skin, palms, and lower extremities.

Yellow feet and palms in babies

When a baby’s skin turns yellow or orange, it can be a source of worry for many parents. The most common areas you will notice this change are the cheeks, palms, feet, and eyes.

In newborns, jaundice is the likeliest cause because of too much bilirubin in the baby’s blood. This symptom will last for just about 5 days. In cases of mild jaundice, the baby may not show severe discoloration. It may be limited to the eyes and upper part of the body.

However, when the feet and palms are unusually discolored, it could be severe jaundice. This should be taken seriously as it can cause brain damage.[5]

Another possible reason for the discoloration in children is lycopenemia. It is a condition similar to carotenemia because dietary intakes cause it. If children feed on plenty of foods rich in lycopene for quite some time, they are likely going to develop a yellowish discoloration on feet.

Foods that cause lycopenemia include pink grapefruits, watermelon, tomatoes, apricots, and guava. The good news is that this condition is harmless and there’s nothing to worry about. Reducing these foods in your child’s diet is likely going to reverse the discoloration.

Yellowing toenails and fungal infections

Discoloration of toenails is more of a symptom than a cause in itself. The most common cause is a fungal infection or respiratory diseases. Your nailbeds will begin to turn yellow, and the skin on your feet will also start to discolor.

Fungal infections can easily cause black toenails, but these can sometimes start as yellowish parts on the skin. Stunted nails, weakening, and breakage, may also accompany the problem. The skin may also start to thicken and discolor to a yellow-brown discoloration. When this is the cause, you may start to experience a foul smell from your feet.

Treatment and getting rid of foot discoloration

Treatments and remedies must be specific to eliminate the cause of the symptom. Before you try to get rid of yellow feet, you need to first identify the cause, then treat it. Medical treatments may include the following:

  • For anemia, nutritional supplements such as iron, vitamin B12, folate, and other iron-rich foods can help get rid of the yellow discoloration on your feet.
  • To treat jaundice, your doctor may decide to increase iron in your blood or to improve oxygen supply in the body. Phototherapy or special light treatment may also be used for the case of newborn jaundice to get rid of the excess bilirubin. In adults, acute viral hepatitis may need to be treated for the yellowing of palms and feet to go away.
  • Surgical treatment can also be used to heal the problem if a blocked bile duct causes it.
  • Patients with yellow toenails may be suffering from a fungal infection. Topical anti-fungal medication can be applied to the affected area to get rid of it.
  • If the symptoms are caused by a diabetes problem, your doctor will come up with a treatment plan for you. In some cases, you may need other healthcare professionals such as a nutritionist, an endocrinologist, an eye doctor, and a foot doctor to manage the problem.

What can you do at home?

For most people, corns and calluses will disappear when the pressure causing them stops. If the skin is too thick, your doctor may need to perform an excision to shave off the excess dead cells.

According to WebMD, most doctors will advise you to use an OTC salicylic acid remedy to heal and get rid of corns and calluses.

Moleskin pads can also help relieve the pressure on your feet, which makes them easy to manage and heal. For all these, you may not need to attend medical appointments. Instead, you can apply them at home for gradual healing. Here are more home remedies to try:

Epsom salt soak

One of the best ways to remove a thick skin on your feet is to soak in a warm Epsom salt solution. It will soften your feet and make it a lot easier to scrub the tough skin off.

We highly recommend Epsom Salt By Sky Organics (Check the price on Amazon)

Put hot water in a tub and add a handful of the salt. Stir thoroughly. Soak your feet for about 15 minutes and then scrub the area with a pumice stope. Wash your feet afterward. You can repeat this remedy twice a week to get rid of the yellow calluses on the bottom of your feet.

Baking soda

Baking soda is also a good natural exfoliant. In a tub of warm water, add 4 tablespoons of baking soda and stir well. Soak your feet in the solution for 10 minutes and start scrubbing with a pumice stone. Rinse and moisturize when done. Repeat this treatment 2-3 times a week to get rid of yellow calluses on your feet faster.

References

[1] Chiriac Anca et al (2013): Yellow Palms and Feet in a Child http://www.romj.org/2014-0107

[2] Denise B Freeman (2002): Corns and Calluses Resulting from Mechanical Hyperkeratosis https://www.aafp.org/afp/2002/0601/p2277.html

[3] Sandeep Julka et al (2013): Yellow Palms and Soles: A rare skin manifestation in diabetes mellitus https://www.ncbi.nlm.nih.gov/pmc/articles/PMC3830339/

[4] American Society of Hematology: Iron Deficiency Anemia http://www.hematology.org/Patients/Anemia/Iron-Deficiency.aspx

[5] WebMD: Jaundice in Newborns (Hyperbilirubinemia) https://www.webmd.com/parenting/baby/tc/jaundice-in-newborns-hyperbilirubinemia-topic-overview#1

10 Best Earwax Removal Kits & Tools Reviewed 2019

When it comes to taking good care of your ears, an ear wax removal tool comes in handy. Having one is a characteristic of unquestionable personal hygiene standards.

Old methods like using cotton swabs ought to be replaced by earwax removal buds and kits.

Earwax removers are not made the same. No doubt about that. That is where you might miss the point when shopping for one. Here are the top 10 best earwax removal kits that will fit your needs.

Top 10 ear wax removal kits

But why are these on our list of top 10 products? Here are is important info you should know about each of them.

IMAGE PRODUCT DETAILS
  • Enhances the body’s natural performance to minimize wax build-up.
  • The most sought-after ear wax kit on the market
Check price
  • Safe and natural
  • Packed with earplugs, carbazide peroxide, and a cup
Check price
  • Embedded with a rinse tab, ear drops, and ear wash syringe and earplugs
  • Very useful for people using hearing aids
Check price
  • Packed with a bottle that has a rubber bulb and foam
Check price
  • Dissolves and solves exuberant overflow of the wax
  • A well-orchestrated glycerin wax solvent
Check price
  • Quick, but an easy fix on your wax build up
  • Arbamide peroxide solution
Check price
  • Natural, effective and simple remedy
  • No urge for syringing
Check price
  • Recommended by most doctors
  • Easy to use and affordable
Check price
Mudder 3 Pieces Ear Pick Ear Cleaner
  • Made from soft cotton
  • Skid resistant, portable and lightweight
Check price

Similasan ear wax eliminating kit

Similasan Ear Wax Removal Kit.33-Ounce Bottle and Ear Bulb

Not only does this product remove wax, but it also enhances the body’s natural performance to minimize wax build-up. One of its unique features is an ear canal friendly glycerin-based formula that never causes itching or dry skin.

With no interactions and the usual side effects, it remains the most sought-after ear wax kit on the market. For over 20 years in circulation, this Similasan ear cleansing kit has received positive customer reviews.

You can occasionally use it to loosen, soften, and eventually eliminate ear wax that is excessive in your ears. Ingredients that present in Similasan temporarily provide relief from the following complications:

  • Ear wax – clogged sensation
  • Buzzing or ear ringing is commonly known as tinnitus
  • Ear canal itch and dry skin

NeilMed Clear Canal Ear Wax

Safety and natural are the selling points of these products, and NeilMed never disappoints. The drop tip is easy to use. The whole kit is packed with earplugs, carbazide peroxide, and a cup.

  • The earplugs help in holding the medication intact while the well-designed cup prevents an overflow of the remedy on the ears environs.
  • Both children and adults can use this product as it poses no harm to either.

This product is not recommended for children under the age of 12. However, preceding the administration of this product to an under 12, a physician’s consultation should be considered.

Both ear canals should receive 10 drops using a dropper made of plastic to squeeze them. This is after the head is tilted sideways.

Be cautious that the ear canal does not come in contact with the bottle’s tip. Using earplugs that are enclosed or ear kept drops should be maintained for 10 minutes or so with a still kept tilted head.

Mack’s ProRinse Earwax Removal System

Mack's ProRinse Earwax Removal System

Getting rid of excessive ear wax from your ears is made easy by Mack’s earwax product, enhancing your hearing capability.

  • It is a complete package that is embedded with a rinse tab, ear drops, and ear wash syringe and earplugs.
  • This lightning strike ear drop targets foam and earwax on contact, assisting in loosening, softening, and breaking up any ear wax build-up while conditioning the delicate lining of the ear canal.

This ear wax kit and tools are very useful for people using hearing aids. Excellent continuous flow at the ear syringe embedded with etiquette safer rinse tip. The unique tip prevents an overflow of the drop.

Debrox Drops Earwax Removal Aid Kit

Debrox earwax removal kit

Debrox is packed with two important tools: a bottle that has a rubber bulb and foam. The manufacturer understands safety and comfort, which is important to the end-user.

The flocculent bulb syringe enables you to exhume the wax build-up in your ears, making sure that your canal stays free from wax and stays clean at the same time.

The active ingredient in this product is carbamide peroxide, which has proved itself efficient and effective in ear wax elimination.

Partial hearing loss, ear discomfort, and itchy ears are complications that could arise from too much ear wax build-up. Using Debrox will relieve you of these complications.

Squip Products Kyrosol-Ear Wax Removal Kit

Squip Kyrosol-Ear Wax Removal Kit

When comfort and safety cannot be ignored when coming up with these products, what more could you ask for from Kyrosol? It was made to dismantle The Kyrosol Ear Wax remover that dissolves and solves exuberant overflow of the wax.

No more worries about hardened and impacted build up in your ears. Your eardrum is also kept safe while using the highly designed tip. Controlling the amount of flow you want is at your mercy because the syringe feature is set to do that.

Uniqueness has always been a factor never to ignore when it comes to Kyrosol. A well-orchestrated glycerin wax solvent, with the main purpose of dissolving extremely hardened wax, flushes them out.

Murine Ear Wax Removal System

Murine Ear Wax Removal System

If you are looking for a quick but easy fix on your wax build-up, then this one is the ideal choice. It constitutes a gentle but quick-acting formula, safe, maximum strength, and system recommended by doctors.

This system will eliminate ear wax safely. A fast functioning carbamide peroxide solution with a tender bulb ear cleaner is the main component of the kit.

The drop should never be used for more than four days unless your doctor recommends so.

Earol Natural Olive Oil Ear Wax Softener

Earol Olive Oil Natural Ear Wax Softener Naturally Removing

Earol olive oil is a natural, effective, and simple remedy for naturally softening and eliminating ear wax, killing the urge for syringing.

Its unique yet simple flowing system has the capability of delivering the exact amount needed in your ears. This will help in preventing an overspill or overflow of the oil all over your ears.

A direct shot to your ear canal through the ontological actuator is very achievable with this natural product. The direct shot enables the oil to work without running out of your ears before doing its designated duty.

This product is different from other types of earwax removal tools and kits that will force you to have earbuds or cotton wool to stop backflow.

Doctor Easy’s Elephant Ear Washer Bottle System

Elephant Ear Washer Bottle System by Doctor Easy

So far, according to user reviews and ratings, this product stands out for itself. With a wide user range, you don’t need different types of ear washer products when this is your type.

Pros

  • Recommended by most doctors
  • Easy to use and affordable.
  • It is a quick ear wax remover.

Earwax menace is not only an adult problem, and kids too experience it. According to the manufacturer, Dr. Easy, it is recommended for both adults and children alike.

Mudder 3 Pieces Ear Pick Ear Cleaner

Mudder 3 Pieces Ear Pick Ear Cleaner, 304 Stainless Steel

For your home ear care, this 3 piece ear cleaner is an added advantage. The buds on both ends are a sure bet to fully remove the ear wax build-up from your ears.

  • It is made from soft cotton, which smoothly massages your ear canal without inflicting any pain or damages.
  • With a choice of three steel, rods that are skid-resistant, portable and lightweight, you are sure that you can be able to remove impacted ear wax with ease.

Flat Ear Pick Remover Curette Ear Cleaners

Quality Ear Care Flat Ear Pick Remover Curette Ear Cleaners

One of the two sharp ends of the stainless steel rod is used to scoop out the wax and the other for relieving itchiness.

The mid-section of it has a depression that your thumb can fit into, providing a stable and robust grip.

This tool is useful for removing wax that is outside the ear.

In case you are facing similar complications, then some products could help you out. In most cases, those who are aware of earwax removers have no idea how these products function and which ones to go for.

The cleanliness of your ears is a vital step in ensuring that your ears are clean of wax as well as free from related complications to prevent blockage, reduced hearing, and even impacted earwax.

Here’s a summary of the kits you can count on:

Top 10 ear wax removal kits
Top 10 ear wax removal kits-web

Risks these products could pose when used

Ear irrigation is a procedure that is always supposed to be in a routine, is performed to get rid of cerumen or excessive ear wax build-up and other alien materials to the ear and its surrounding.

Naturally, there is a wax secretion from the ear that is used in hindering the growth of bacteria as well as lubricating and protecting the debris of the ear. Under normal circumstances, the body functions in regulating the ear to produce ear wax that is controlled correctly.

A blockage inside an ear is normally caused by evenly hardened ear wax or excessive ear wax build-up. This results in tinnitus, ear blockage, temporary or even permanent hearing loss, and earaches.

Should you have ear canal infections, ear tubes, a weakening immune system condition, the last thing you want to do is have ear irrigation at your place or a practitioner’s office. Although ear irrigation is a common process, risks do come about with it.

Infections of the Ears

As stated earlier, ear infections are complications that arise from ear irrigation. One of the hazardous complications is known as Otitis externa. This condition is caused by an infection that leads the ear to have inflammations.

It is very painful. Another complicated condition is referred to as Otitis media, which is an inflammation of the middle ear that is also infection- caused.

Perforation of the eardrums

Ear irrigation may compress ear wax, leaving it to be more compact. As a result, too much pressure is put immediately to the eardrums hence increasing perforation risk. In other cases, trapping of fluids in canals of the ear occurs. This increases the pressure that can otherwise rupture eardrums, which is a common complicated potential condition known as perforated eardrums.

More complications

In addition to the above complications, other rare cases could occur, which include:

  • Deafness can be permanent or temporary.
  • Vertigo, a situation whereby one feels spinning of a room in circular but is normally temporal.

The build-up of ear wax can be critical and dangerous as it can lead to other health risks. Should your symptoms show no improvement while you’re in-home care, you may want to get a check-up by your health practitioner.

If this is in case they may need to refer you to an ear specialist, should they lack to perform other methods. People who listen with hearing aids are normally prone to a build-up of ear wax.

In addition to that, cotton-tipped swabs are not to be inserted in the ear canal, because they can compress ear wax against the canals and the eardrums.

Side effects of too much ear wax

Many side effects are common to many people who have undergone ear irrigation. However, these side effects should not be a worry because they are not as critical as the above-discussed complications though they may be uncomfortable. These common ear irrigation side effects are as follows:

  • Ear canal pain or discomfort
  • Temporary dizziness
  • The sensation of ringing ears, otherwise known as tinnitus.

These side effects are normally very short lasting and are invisible just after a day. If you start experiencing discomfort or pain, which eventually starts worsening, you should consider having an appointment with your doctor.

Do not hesitate to get a check-up immediately in a situation that you may e having ear damage or a perforated eardrum.

Guide for buying ear wax kit products

Before you decide to buy any item, you may want to have a look back at these facts to prevent any worthless hassle.

Previous customers’ experience

Previous unbiased buyers’ reviews that are left behind are the most effective way of having a background idea of the item that you are considering to buy. This way, you recognize the merits and demerits of that item resulting from feedbacks. All you have to simply do is check reviews if you want to read the buyers’ feedback on the product you want to get.

How the product has been rated

Apart from leaving behind feedback, other customers also score a product from a scale of 0-5 or 0-10.

The majority of the customers find a rating of 7 or higher out of 10 or a 3 or more out of 5 to be more appealing and not a waste of time or money.

Should the rating of the customers be below a 7 or below a 3 you, then need to scrutiny the feedbacks properly.

Budgeting

For products in the Ear Care – Irritation & Inflammation Medication class, some price tags do come with them. Here quality is more important than even the price itself. If you want a daily use product, then you would require a high ending and long-lasting one.

Though this would be a little bit costly, a mid-range product would be efficient to do the work for you if you were to go for occasional use.

How to use earwax build-up removal kits

Irritants and water are normally prevented by ear wax in ears; however, they may need removal methods due to build-up in the ears.

Ear wax kits are normally sold in most drugstores for an emergency just like this, which is home- use safely.

You may need to have an occasional follow up with your audiologist or your doctor if you put on hearing aids or should the kit malfunction in removing ear wax thoroughly.

 Step 1

Using soap, thoroughly clean your hands. Take a washcloth, which is clean and dampen using warm water. Using the washcloth, gently cleanse your ear’s outside but do not attempt to get the inside of your ears cleaned because the wax might be further pushed in.

Keenly follow the directions in the packages to squeeze bulb or fill the syringe using the cleansing solution.

Step 2

Your head should be tilted sideways in a way that the ear which is affected must be facing up. Get yourself an assistant who would help you have ear drops applied for you. Your helper should make sure that during the administration, your ears do not come in contact with the dropper.

If you are the one helping out, fold a clean towel to help the person’s head still.

Step 3

Following the recommendations of the manufacturer, apply the ear drops as you let your subject rest for about 2-5 minutes.

Sit up after you compress to the ear, a cotton ball. Do not disturb the solution and allow it to remain still for about 15 to 20 minutes or for even overnight, depending on the instructions.

Step 4

Using the second solution, the wax should be flushed out using the second one in case your kit only possesses one. Using either plain water, hydrogen peroxide, or even saline water, gently, the solution should be squirted in the ear.

Step 5

This has to be done daily for 2 to 3 days until the removal of all the wax is proven.

Things You Will Require

  • A clean washcloth
  • Antibacterial soap
  • Clean towel
  • Cotton balls
  • Warm water

Tips

  • In order for the wax to be drained out at night, you are supposed to sleep on a folded towel with your head tilted in a position that the affected ear has faced down.

Warnings

  • Do not use anything sharp to dig out the wax lest you end up with a damaged ear.

More methods for removal of ear wax

1. Hydrogen Peroxide

Hydrogen peroxide can be used for many purposes, like in manufacturing DIY toothpaste and wound disinfection. It is also a very effective way to eliminate too much ear wax, according to many naturopathic doctors.

The bubbling reaction of hydrogen peroxide makes it effective. It starts to bubble up as its process of seeping in the earwax. This way, it comes in handy as it breaks down ear wax that is caked up.

2. Rubbing Alcohol, Tea Tree Oil and Apple Cider Vinegar

Despite not being as effective as Hydrogen peroxide, this option is worthy for those who are not in favor of hydrogen peroxide. Rubbing alcohol and tea tree oil is very effective when it comes to infection-fighting; thus, they are used to eliminate swimmer’s ear, ear infections, or anything similar.

According to recommendations, it is advised that you mix a little amount of apple cider vinegar and tea tree and test its reaction on your body location that is inconspicuous before you try it out. Since the ear canal may dry out, the method should be tried out only seldom. Using this approach, irritations occur; thus, you first have to try it somewhere.

3. Olive or Coconut Oil

Olive or coconut oil comes in handy should you want to clean the ear wax in your ears in a situation whereby you have no cleansing agent, and you are desperately in need of one. These two can ease your ear wax, which simplifies the ear wax to easily come out more so with the use of a bulb aspirator.

4. Mineral Oil

In similarity to olive oil and coconut oil, warm mineral oil can perform the same function of breaking up as well as softening ear wax, thus alleviating it. While using the second approach causes ear canal irritation and dry out, using mineral oil leads to none of that.

However, using this approach is not a solution for blocks that are stubborn but is effective for regular cleansing.

5. Warm Distilled Water

Using warm water is a way that is normally less aggressive. Warm water is a sure remedy for skeptic people who would rather put water into their ears and nothing else.

Despite having the potential to aid in ear wax removal, it is not as effective as it seems to be.

6. Oils infused with Garlic

This last remedy is really amazing. Here is why it is. Not only can it eliminate earaches that are caused by an infection, but also can it get ear wax cleared out. This remedy is effective because it makes good use of a high concentration of allicin that is present in garlic, which is a naturally very powerful antimicrobial agent.

You probably do not even know that, according to studies, garlic has been found out to be several dangerous pathogen killers inclusive of parasites, bacteria, fungi, and even viruses.

7. Omega-3s Helps Prevent Buildup of Earwax

We are normally taught that the best and most effective way of getting a solution to a problem is aiming directly at its root cause. This means that the reason behind there is too much build-up of ear wax in your ears could be your diet probability.

Lack of correct quality and quantity of omega 3 in a diet could cause the production of high capacity of ear wax in the sebaceous glands in the ear canals. This simply means that a deficiency of omega 3 in your body would cause ear wax associated problems.

Needless to say that the next time your ear wax is in excess, you might want to reconsider having a supplement that is omega 3 rich or rather gets yourself a freshly caught fish. Flaxseed oil will be the second option if you’re a vegetarian or if you are strictly on a plant-based diet.

8. Solutions and Mixtures

Another alternative way to get rid of excess ear wax is by making a mixture of vinegar oil and hydrogen peroxide or hydrogen peroxide and rubbing alcohol. You could also use a mixture of rubbing alcohol and vinegar oil or a mixture of all three. They remove ear wax by simply softening the ear wax.

They pose no harm and thus have been regarded as efficient, safe, and effective. Also, they work in the condition that the eardrum should be fully intact. Despite these mixtures being harmless, some people find using this approach irritating, while others are skeptical about it.

Additional tips for dealing with excess

You might be in a case whereby your ear wax is very stubborn, thus here is a list of additional tips that can aid you in alleviating excessive ear wax other than the above-discussed approaches.

  • Diary Elimination: Aftermath infancy, 65% of the total human population in approximation, cannot digest dairy thoroughly. Due to the lack of put up with this condition, a trigger of the immune system response occurs. As a result, there is an excess of the contribution of ear wax build-up in your ears.
  • Try an elimination Diet: At the back of your head, you should be able to know that any kind of diet that your body is intolerant to would cause complications to you. This in mind then, not only can dairy cause excess ear wax, but also any kind of food that you cannot put up with. Therefore to avoid other complications inclusive of ear wax build-up, eliminating a diet might be your incoming solution. Many affirm to this therapeutic solution as their radical lifesaver.
  • Ear Candling is a NO:  Ear candling might seem a method that is a common method to turn to for many people alike but, little do they know that even several authorities deem it both potentially dangerous and ineffective. It should be well known that should all other approaches fail, attempting ear candling should a firm no!

 But what causes the build-up?

Just because many are excess ear wax prone, it does not automatically mean that they have an ear blockage. Some people are prone to produce too much earwax.

Still, excess wax doesn’t automatically lead to blockage. Factually speaking, the common main cause of a blockage is this at-home earwax removal therapies. These include using bobby pins and cotton swabs that can create blockage through the deep push of wax.

Do you have your earphones always on you? You definitely should be assured that you will have a build-up of ear wax in your ears. Inadvertently, they cause blockages because they occasionally prevent the outcome of earwax out of the ear canals.

Ear wax build-up signs and symptoms

Dark brown and light yellow are the common color appearances of ear wax though there are other varied and darker colors do not necessarily indicate that there is ear wax blockage.

Signs of earwax build-up include:

  • Sudden temporal or partial hear loss
  • Buzzing or ringing in the ears a condition known as tinnitus
  • Having a full ear sensation
  • Having earaches

Failure to remove the build-up of ear wax would directly cause infections. Do you experience the following infection signs and symptoms?

  • Fever
  • Occasional hearing loss
  • The occurrence of drainage out of  the ear
  • Pain that is severe inside the ear
  • Dizziness
  • Nonsubsiding painful ears
  • Coughing
  • An unpleasant odor proceeding out of your ears

Then you may want to give your doctor a quick check-up. One thing that should be relayed clearly is that if symptoms like earaches, hearing loss, and dizziness frequently occur to you, then you should visit your doctor. This is because they do not necessarily indicate ear wax blockage.

An evaluation of any full medical analysis would aid one to know the due cause of the symptoms, whether it could be an excess build-up of ear wax or if it could be just any health complications entirely.

Ear wax is part and parcel of your normal ear health though it would sometimes pose discomfort to you.

Doctors also advise that you are not to occasionally alleviate ear wax out of your ears with objects. This is because they can pose a danger to the already existent problem.

Cotton swabs are also not to be used in cases that are severe because they eventually lead the ear canal or even the eardrums to be damaged.

It is only necessary to go for a medical check-up when your ear has excess ear wax that does not independently and naturally comes on its own out of the ear. You should get assistance administered immediately to you should you suspect that you have an ear blockage or build-up of ear wax.

Sulfur Burps and Diarrhea, Vomiting, Farts: Causes, Cures & Remedies

Sulfur burps are sometimes known as egg burps. They arise as a result of the digestive system expelling out hydrogen sulfide gas produced in the process of protein breakdown.

In this article, you will find information on what exactly are the causes of the problem, accompanying symptoms and cures that get rid of the foul sulfur belches and diarrhea. Also, various home remedies to deal with the condition have been extensively discussed.

What are sulfur burps?

The process of expelling gases from your stomach is known as burping. Sulfur burps occur when you consume excess foods with high amounts of proteins.

These are broken down in the intestine and stomach by the digestive system, and in the process, a lot of gases (hydrogen sulfide) is released. These gases have a pungent rotten-egg smell.

Most of the causes of sulfur burps are not in any way life-threatening and are easy to treat, especially with home remedies. However, when egg burps are accompanied by nausea, diarrhea, or vomiting, it could be an indication of a more serious underlying health issue that needs to be addressed.

In such cases, it is always advisable to see your doctor for examination and management of the condition.

Causes of sulfur burps and watery diarrhea

  1. Gallbladder Disease

Gallbladder disease causes damage to the bile duct, a component that plays a bigger role in ensuring there is complete digestion. The common symptoms of gallbladder disease are diarrhea, incomplete digestion, and burping.

However, it is also important to note that if you have damaged bile, the damage interferes with the normal flow of bile in the digestion process resulting in slow and incomplete digestion. This factor leads to bloating and belching. Additionally, symptoms such as diarrhea and burping may be experienced.

  1. Medications

Some medications have been manufactured with ingredients containing sulfur compounds such as methionine amino acids or cysteine.

These medications, when taken, result in sulfur compounds dissolving in your stomach content and begin to release sulfur smelling burps or burps that smell like rotten eggs.

  1. Intestinal Bacterial infection

According to the journal of clinical Gastroenterology, an intestinal bacterial infection can result in a host of intestinal problems such as watery diarrhea, white diarrhea, stomach ulcers, and sulfur burps. The common types of bacteria that cause intestinal problems are Giardia lamblia and H. pylori.

H.pylori can cause sulfur compounds to build up in the stomach, and this in the long-run results to halitosis, stomach ulcers, excessive burping (including sulfur burps), and other gastroenteritis issues.

On the other hand, Giardia lamblia causes diarrhea, fever, sulfur burps, and other gastroenteritis problems such as a bloated abdomen and bloated gas.

  1. Irritable Bowel Syndrome (IBS)

Irritable Bowel syndrome produces high levels of hydrogen sulfide, which can cause inflammation of the gastrointestinal tract, gut abnormalities, diarrhea, and sulfur burps.

The symptoms of irritable bowel syndrome may vary from patient to patient. It is therefore important you see your doctor for examination and proper guidance.

  1. Small Intestinal Bacterial Overgrowth (SIBO)

The intestine has bacteria that are essential in nutrient absorption and the breakdown of food compounds; however, when these bacteria build-up to excess levels, they cause gastroenteritis problems.

These include a bloated abdomen, a build-up of hydrogen methane, sulfide, and carbon dioxide gases, which in turn result in sulfur burps that smell like rotten eggs.

  1. Improper Diet

Dieting on heavy meals that are hard to digest, such as proteins and carbohydrates, stay in the colon and stomach for a very long time, a factor that results in the accumulation of hydrogen sulfide in the stomach, that latter comes out in the form of a sulfur smelling burps.

To avoid sulfur burps, you need to regulate your diet by eating small amounts of protein and carbohydrate foods.

Some of the foods to be taken in small quantities include:

  • Cakes and candy
  • Poultry
  • Dairy products such as yogurt
  • Red meats
  • Some vegetables such as cabbage
  • legumes
  1. Crohn’s Disease

Sulfur Burps are very common in people who suffer from Crohn’s disease. The reason is that people who are affected by Crohn’s disease normally have incomplete and slow digestion.

However, if you have felt that you are experiencing slow and incomplete digestion, you need to visit your doctor for examination, diagnosis, and medical treatment.

  1. Chronic Medical Conditions

Chronic conditions in your digestive system, such as celiac disease, gastrointestinal reflux disease, pancreatitis, and colon cancer, are also known to cause sulfur burps and diarrhea.

Also, studies have suggested that regular belching in the elderly could be a sign of a chronic health disorder within the digestive system.

  1. Food Poisoning

Food poisoning is among the major causes of diarrhea and burping and is caused by a build-up of bacteria in the digestive system due to eating bacteria-contaminated foods.

These contaminated foods result in burping, diarrhea, and consequently, burps that smell rotten eggs.

  1. Mal-digestion and mal-absorption

Though mal-digestion and mal-absorption may not directly lead to sulfur burping, it interferes with lower bowel. In this case,  bacteria get nutrients and residue to feed on a factor that results in overgrowth of bacteria in the digestive tract; this, in turn, brings about sulfur burping and diarrhea.

Rotten-egg smelling farts

Farting is the passing of air out of the body through the rear end. Air is usually produced in the stomach during the process of digestion.

The bacteria in the intestines cause the production of gas by breaking down proteins and starches that cannot easily be broken down by enzymes. Some of the causes of rotten-egg smelling farts include:

  1. Lactose intolerance

Lactose intolerance is the difficulty of the digestive system to break down carbohydrates (lactose) such as dairy products due to insufficient production of lactase enzymes in the intestines. Therefore digestion of these products is slowed down, resulting in discomforts in the lower abdomen, and this causes one to pass out rottenegg smelling farts.

  1. Alcohol consumption

Sulfur compounds have preservative capabilities; hence they are used as additives in the production of drinks such as wines and beers. However, when these alcoholic drinks are consumed, the sulfur compounds are broken down in the stomach and intestines into hydrogen sulfide that is released out as rottenegg smelling farts.

  1. Sensitivity to Gluten

Gluten-sensitive people have a hard time breaking down and digesting certain food types with gluten content.

However, in the process of digesting these foods, a lot of gas is usually produced that causes discomfort in the lower abdomen in the form of rottenegg smelling farts.

  1. Flatulence

Flatulence is a side effect of taking over-the-counter medications. Sulfur ingredients are used in the production of many medications; hence when these medications are taken, the sulfur compounds will be broken down in the intestines resulting in the production of gases in the form of rottenegg smelling farts.

Stomach pain (upset stomach)

Burping and diarrhea are usually the tale-tale signs that your stomach is not in good condition.  According to US Centers for Disease Control and Prevention, about 10 million Americans report to doctors every year due to stomach problems.

Stomach upsets, in most cases, are usually due to consumption of foods that have high contents of proteins; hence when these foods are broken down, they release high volumes of gas, which is released as hydrogen sulfide (sulfur burps).

Some of the foods that might irritate your stomach and make you end up stomach upsets include:

  • Poultry products such as eggs
  • Dairy products
  • Red meat.

Sulfur-smelling breath

According to medicalFoster sulfur smelling breath is due to a condition known as Gastroesophageal reflux.

This is a condition whereby partially digested food in your stomach flows up the esophagus creating discomfort and unpleasant burps that smell like rotten eggs.

Vomiting and nausea

Though vomiting and nausea are rare symptoms that accompany sulfur burping, the following could be the possible causes of this condition:

Racin poisons

Racin is poison normally found in castor beans, and this poison gets into your digestive tract, it results in nausea, diarrhea, and vomiting. Sometimes it can also cause symptoms such as fever, excessive sweating, and trouble breathing.

Shigellosis

This is a condition that causes an abrupt inflammation of the intestines and stomach, resulting in diarrhea, vomiting, and nausea.

Mesenteric lymphadenitis

This is swelling of the lymph nodes in the abdomen, a factor that eventually results in vomiting, pain, and a feeling of nausea.

Rotavirus

This virus results in swollen and inflamed intestines, thus resulting in diarrhea, vomiting, and nausea.

How to get rid of sulfur burps

Home remedies and cures

There are many home remedies that can effectively get rid of sulfur burping, and its accompanying symptoms, among the remedies and measure to be taken, include:

Avoid foods that increase burping symptoms

To reduce the effects of sulfur, burps consider avoiding the following foods:

  • Red meats, eggs, and poultry meat.
  • Dairy products, such as milk and yogurt.
  • Seeds and nuts such as cashew nuts, pine nuts, walnuts, sesame seeds, pistachios, and peanuts.
  • Fruits like bananas and avocado.
  • Legumes such as beans, lentils, carob, soy, and alfalfa.
  • Also, foods such as yams, broccoli, Swiss chard, asparagus, watercress, and potatoes.

Baking Soda

Baking soda is a common household substance with a white crystalline look that is usually used as a baking agent.

When used to get rid of sulfur burps, it acts as an antacid to neutralize the acids in your digestive tract and also helps to restore the PH balance of your digestive tract while getting rid of bloating and excessive gas.

To use Baking Soda:

  1. Take warm water in a glass and add to it 1 tablespoon of baking soda.
  2. Stir the mixture thoroughly and add a few drops of lemon juice.
  3. Drink the whole glass of the mixture.
  4. Repeat this process after 3 hours, then before going to bed.
  5. Alternatively, you can follow the same steps, but instead of lemon juice, you can substitute it with apple cider vinegar.

It is important to observe the following before using baking soda as an antacid.

  1. Avoid using baking soda to get rid of sulfur burps in children.
  2. If you are on other over-the-counter prescriptions, consider consulting your doctor before using baking soda as a remedy for sulfur burps because it can interact with this prescription and result in severe effects.
  3. If you have any underlying chronic medical conditions such as kidney failure, Hypocalcemia, liver cirrhosis, or heart failure, avoid using baking soda.
  4. Pregnant and lactating women need the guidance or direction of a physician as to whether they can use baking soda for sulfur burps or not.
  5. Baking soda when taken in high amounts can lead to high blood pressure; hence do not use large amounts of baking soda.

Manuka Honey

Honey contains ingredients that are rich in antibacterial properties. When used to get rid of sulfur burps, it kills the potential bacterial causing infections within the gut and the digestive system, example of such bacteria in the digestive system include Enterobacter aerogenes , Escherichia coli (E. coli) and salmonella typhimurium.

Also, in the process of getting rid of sulfur burps, manuka honey, helps to protect the digestive lining and relieve symptoms of stomach disorders. However, to make an effective home remedy of honey, you need to mix honey and lemon juice.

How to make a remedy of honey:

  1. Take half glass of warm water.
  2. Squeeze a fresh lemon and add the juice to this warm water.
  3. Add 5 tablespoons of honey to this solution and stir thoroughly.
  4. Drink this mixture 3 times per day for 2 days to get relief from sulfur burps and gas.

Also, a great choice would be a Certified Manuka Honey by Onuku (Check price on Amazon)

Green Tea

Green tea can help to reduce excess gas and get rid of foul-smelling sulfur burps and stomach pains.

To use Green Tea:

  1. Take a glass of hot water.
  2. Add some mashed green tea leaves to it or 1 tablespoon of dried green tea powder.
  3. Allow the mixture to cool down for 15 minutes.
  4. Filter the mixture and then drink it.
  5. You can repeat this process 2 times a day for 2 days.

Peppermint Tea

Drinking peppermint tea is a very effective way of getting rid of smelling sulfur burps and diarrhea. Drink this regularly to alleviate egg and sulfur burps.

To make and use peppermint:

  1. Take a glass of warm water and add a handful of dry peppermint leaves powder.
  2. Allow the mixture to cool down for at least 15 minutes.
  3. Strain the mixture and drink it.
  4. Drink 2 to 3 glasses of this remedy per day till burping goes away.

Chamomile Tea

Many researchers have shown that chamomile tea as herbal has immune-boosting and antibacterial properties.

When chamomile is taken as a home remedy for sulfur burps, the antibacterial ingredients fight bacteria in the gut and the digestive system in the process, helping to get rid of egg-like smelling gas.

To use Chamomile Tea:

  1. Add a handful of chamomile dried flowers into a cup of boiling water.
  2. Leave the mixture to cool down for at least 15 minutes.
  3. Strain the mixture and drink the solution.
  4. Consume this tea every day after taking your meals.

You can also find chamomile tea on Amazon

Ginger Tea

Ginger tea is an effective and faster way of getting rid of sulfur burps. It helps reduce symptoms of sulfur burps and nausea and consequently improves the health of the digestive tract.

To make Ginger tea:

  1. Add 2 teaspoons of ginger powder into a cup of hot water and stir thoroughly.
  2. Leave the solution to cool down for at least 10 minutes and drink the solution.
  3. Consume this tea every day after taking your meals.

Apple cider vinegar

Apple cider vinegar has antibacterial and healing properties that make it an effective solution for sulfur burps when used regularly.

To use apple cider vinegar:

  1. Take apple cider vinegar and add 5 teaspoons of apple cider vinegar to a glass of lukewarm water.
  2. Drink this solution every day before going to bed.

Drinking water

Drinking water enough water is also one of the best ways of getting rid of sulfur burps and bad breath. Many studies have indicated that drinking a lot of water daily helps to protect your stomach from being infected by bacteria and the effects of sulfur burps.

 Treatment options

Here are some of the treatment options that can be used to get rid of sulfur burps. Consider the following:

  1. Over-the-counter medications

Many over-the-counter medicines help to get rid of accompanying symptoms of sulfur burps. It is important to consult your doctor to know which medications are best suited for you.

  1. Digestive Enzyme Supplements

Digestive enzyme supplements are very effective in getting rid of sulfur burps. They speed up the breakdown of proteins and carbohydrates in your digestive tract, hence facilitating effective and speedy digestion. It is important to consult your doctor for prescriptions of these supplements.

  1. Adding Probiotics to your Diet

Probiotics will kill the bacteria that produce foul gases and improve the efficiency of the immune system. Probiotics can be found in pickles and yogurt. We highly recommend Nordic Naturals Flora Probiotic Comfort – Probiotic for Intestinal Health, For Those With Digestive Issues (Check price on Amazon)

  1. Use Activated Charcoal

Activated charcoal absorbs hydrogen sulfide gas that causes sulfur burps that smell like rotten eggs. However, you also need to know that activated charcoal does not work for everyone. It is, therefore, important to consult your doctor before using it.

References

  1. https://www.medicalnewstoday.com/articles/319392.php
  2. https://www.belmarrahealth.com/sulfur-burps-rotten-egg-burps-causes-home-remedies/

Dents on Nails: Causes When Small, Vertical, Horizontal & Treatment

Dents in the nails are small depressions forming on nails and are often referred to as nail pits. In many cases, the small depressions may arise without any particular reason, or they may occur due to vitamin deficiency. Let’s find possible causes and treatment of dents on nails.

Causes of dents in nails

Nails are made up of a protein called keratin. This protein component forms on both the fingers and toes. The work of keratin is to protect the nail bed and nerve endings. It is important to note that healthy nails are normally free from dents, spots, brittleness, and breakage.

However, nails that split, break easily, and dent may be an indication of an underlying cause that may be in the urgent need to check.  Below are some of the known possible causes of dents in nails:

Injury

An injury from physical activities or manual work or direct accident or frequent nail biting can cause the nails to split and dent.

Psoriasis

Psoriasis is a skin condition that can cause dry plaques to appear on any part of the body. Psoriasis other than causing flare-ups of symptoms on the skin, it is also known to cause splits and dents on fingernails and toenails.

However, several medications can be administered to get rid of this condition, and some of such medications include salicylic acid creams, steroid creams and injections, tar preparations, vitamin D supplements, and anthralin creams. When one is suffering from psoriasis, they should avoid drinking excess alcohol as it can trigger more symptoms of psoriasis.

Alopecia Areata

Alopecia areata is a condition that causes total or partial hair loss. This condition can also cause dents in the fingernails.

Reiter syndrome

Reiter syndrome is a type of arthritis that occurs in response to a bacterial infection.  The symptoms of this syndrome include swelling and pain in the joints, inflammation of the urinary tract, and eyes.

According to the University of Maryland medical school, Reiter syndrome results in severe damage and modification to the production of keratin (a protein that plays a role in the structure of the nails), and this further results in dents in fingernails, especially in women.

According to the University of Maryland medical school, medical treatment for Reiter syndrome includes immunosuppressant, nonsteroidal anti-inflammatory drugs, and tumor necrosis factor inhibitors.

Fungal infection

Fungal disease of the nails usually accompanies itself with symptoms like bright white discoloration, a yellow hue, splits, and dents on nails. And sometimes, when the nails are overwhelmed by the activity of the fungal disease, the nails can become thicker and brittle in texture.

Incontinentia pigmenti

Incontinentia pigmenti, though uncommon, is a genetic disorder that arises as a result of mutations within the genes, especially IKBKG genes. This disorder is usually characterized by symptoms such as dry patches on the skin, lines of hypo-pigmentation on legs and arms during adulthood. Also, split and dents in the fingernails and toenails may occur.

Circulatory problems

Blood circulation problems in the body due to underlying conditions such as anemia and high blood pressure can affect to a greater extent the health of fingernails and toenails, resulting in the appearance of dents and splits in nails.

Vitamin Deficiency

An unhealthy diet and poor body absorption of vitamins result in vitamin deficiency. Vitamin deficiency, such as B-vitamins, which plays an important role in cell growth and deficiency of vitamin B-12, which strengthens nail growth, can result in fingernail splits and dents accompanied by white spots.

Also, lack of vitamins such as Vitamin C, calcium, iron, and zinc can result to nail abnormalities such as koilonychia and others. You need to visit your doctor for consultation and examination if you notice discoloration such as greenness and yellow nails.

Raynaud’s phenomenon (RP)

Raynaud’s phenomenon is a disorder resulting from a series of discolorations of the fingers or toes after exposure to cold temperatures. This discoloration happens due to abnormal spasm of blood vessels that further affects blood flow to tissues.  This hindrance of blood flow to tissues can result in dents and splits on fingernails.

Chemotherapy

Dents and splits may also appear in cancer patients who are undergoing chemotherapy treatment.

Thyroid disease

The decrease in thyroid production is known as hypothyroidism, and it a condition that usually affects women who are over 50 years of age. Hypothyroidism does not cause noticeable symptoms in its early stages. At the early stages, it may cause symptoms such as thin, split, dented, and brittle nails. However, as time goes, hypothyroidism results in soft slow-growing nails with pale nail beds. Hypothyroidism can also cause more problems beyond spit and weak nails such as chronic conditions like pain in the joints, obesity, and infertility.

Other causes

Other possible causes of dents on fingernails may include diabetes, medications, stress, hypocalcemia, cysts, and cancer.

Horizontal dents

Horizontal dents in nails run across the fingernail from one side to another and can be a sign of an underlying medical condition. These dents are often deep and may result to multiple lines to appear across the nail.

However, as indicated above, horizontal dents are often a sign of an underlying medical infection that requires examination and treatment. In some people with horizontal dents, the nails may stop growing until the underlying medical infection has been gotten rid of.

Some of the underlying conditions that can be responsible for horizontal dents include:

  • Thyroid disease
  • Diabetes
  • Kidney disease
  • Cancer
  • Anemia

It is important that when you notice deep horizontal dents on your fingernails or toenails, you visit your doctor for examination, diagnosis, and treatment.

 Small pitted dents in nail beds

‘Small pitted dents in nail beds’ are small depressions appearing on the nail beds. These pitted dents can be shallow or deep, depending on the cause.

In many cases, small pitted dents in nail beds are usually found in people with psoriasis, or In case the pitting happens in people who are not infected with psoriasis. It’s usually a sign of an underlying condition.

Small pitting commonly occurs on fingernails, though it can occur on toenails. In many cases, the fingernail or toenail will have multiple pits or a single pit, which may have an appearance of a thimble.

It is advisable for People with small pitted dents in nail beds, to visit a doctor for examination, diagnosis, and treatment of the potential cause.

Some of the underlying conditions that can be responsible for small pitted dents in nail beds include:

  1. Alopecia areata, which causes temporary hair-loss and patches on the scalp.
  2. Reactive arthritis is a condition that causes inflammation of joints.
  3. Eczema, which is a skin condition that causes the skin to be itchy, cracked, and patchy with flare-ups.
  4. Psoriasis, a skin condition that causes inflammation, itchiness, and dryness of the skin.

Vertical lines or ridges

The major cause of vertical lines is aging.  The nails may begin to form single or multiple vertical ridges as they grow.

These lines run from the tip of the finger to the bottom of the nail, and these lines are usually not a cause for concern unless they are accompanied by symptoms such as pain or unsightly color changes. With a change in age, the fingernails and toenails may begin to show signs such as:

  1. The nails may become thinner or thicker and break easily.
  2. They can also lose their smooth shape.
  3. The nails may begin to dent and split.
  4. The nail may fissure and become brittle.

These symptoms, especially when you are above 50 years, should not be a cause for concern, but you can visit your dermatology for consultation and possibly examination.

Possible causes of vertical ridges

Anemia

Anemia can cause vertical ridges or dents in nails, and usually, the vertical lines (dents) are accompanied by changes in texture in the nails or color changes.

Splinter hemorrhage.

Splinter hemorrhage is a small blood clot beneath the nail beds, which results in vertical discolorations. It is always advisable to visit a doctor for examination and treatment, in case the cause of this small blood clot is not known.

Other causes

Other underlying medical disorders that can cause vertical ridges to appear on the nail include:

  • Trachyonychia
  • Peripheral vascular disease
  • Rheumatoid arthritis
  • Psoriasis
  • melanoma

How to prevent fingernail dents

Practicing preventative measures is the surest way of keeping your nails free from dents, lines, ridges, and other disorders, causing nail problems. Try the following simple steps to prevent the development of dents in your fingernails.

  1. Eat foods that are rich in minerals and protein.
  2. Take foods and supplements that have high contents of zinc and omega 3 fatty acids.
  3. Avoid chewing and biting your nails.
  4. Avoid putting on very tight shoes that can cause vertical dents on toenails.
  5. Reduce the use of nail polishes that contain high contents of harsh chemicals.

Other preventative measures

  • Applying a protective layer to protect the nail bed from getting easily damaged by injury and to strengthen the nails.
  • Practicing good hygiene, by regularly trimming your fingernail by use of sharp manicure clippers or scissors.
  • Regularly use a moisturizer on your fingernails and cuticles.
  • Always keep your fingernails dry and clean to prevent infectious bacteria from growing under your fingernails.

When to see a doctor

It is important to note that not all fingernail conditions are normal, visit your doctor for consultation and examination when you experience the following:

  • If there is thickening or thinning of the nails.
  • If your nails have failed to grow normally.
  • If there are some bleeding and small blood clots around the nail bed.
  • If you are experiencing swelling or pain around the nails.
  • When your nails have separated themselves from the nail bed and surrounding the skin.
  • When there are changes in the shape of your nails, such as nail curling.
  • When there are changes in color, like discoloration of the entire nail or a dark streak under the nails.

Treatment options

A host of different factors causes dents on nails. The treatment of this condition is done after identifying the underlying cause through various sessions of examination and diagnosis; in other words, treatment is done on a case by case basis after identification of the cause.

Below are various treatments that can be administered to various causes;

NAIL PSORIASIS

  1. Psoriasis can be treated through the application of salicylic acid creams to the skin or by the use of steroid injections.
  2. it can also be treated by eating a healthy diet full of vitamins and minerals or avoiding factors that cause skin inflammation, flare-ups, and dryness.

REITER SYNDROME

  1. To deal with Reiter syndrome, medications that prevent secondary infections such as antibiotics and medications that suppress the response of the immune system like cyclosporine can be prescribed by your doctor.
  2. This condition is sometimes accompanied by pain and inflammation. In this case, anti-inflammatory medications can be prescribed by your doctor.
  3. To completely get rid of this condition, your doctor may administer TNF (Tumor Necrosis Factor) inhibitors.

ALOPECIA AREATA

  1. To get rid of alopecia areata, your doctor can consider prescribing, topical immunotherapy, and creams with corticosteroids.
  2. In cases were alopecia areata has severe symptoms, ultraviolet light therapy and corticosteroid injections may be administered to get rid of other symptoms accompanying alopecia.

FUNGAL INFECTION

  1. In cases whereby the fungal infection is accompanied by many other symptoms such as dents on nails, your doctor may recommend antifungal injections.
  2. Also, in this case, oral or topical antifungal medications may be prescribed by your doctor.

CIRCULATION PROBLEMS

  1. Your doctor may recommend physical exercises to improve blood circulation and avoiding exposure to extremely cold temperatures.
  2. Also, your doctor may recommend medication that boosts blood circulation in your body or medications that prevent the blood from coagulation.

RAYNAUD’S PHENOMENON

  1. Your doctor will recommend massage and ensure that you stay away from areas of cold temperatures.
  2. Also, your doctor can conduct electrotherapy to get rid of Raynaud’s phenomenon symptoms or complications.

INCONTINENTIA PIGMENTI

  1. Your doctor will recommend topical corticosteroid creams, topical tacrolimus, and skin moisturizers.
  2. Antibiotics are also very powerful in getting rid of this condition, as they help to prevent secondary infection.

VITAMIN DEFICIENCY

  • Your medical doctor may recommend vitamin-rich supplements and recommend changes in diet, which may involve eating too much of green vegetables and fruits.

THYROID PROBLEMS

  • To get rid of thyroid problems, your doctor will administer thyroid hormones in your body to restore hormonal balance.

INJURY

  • After nail injury, you must seek medical care for the injury and practice good nail hygiene during the recovery period.

References

  1. https://www.healthline.com/health/skin-disorders/nail-pitting
  2. https://www.medicalnewstoday.com/articles/319321.php