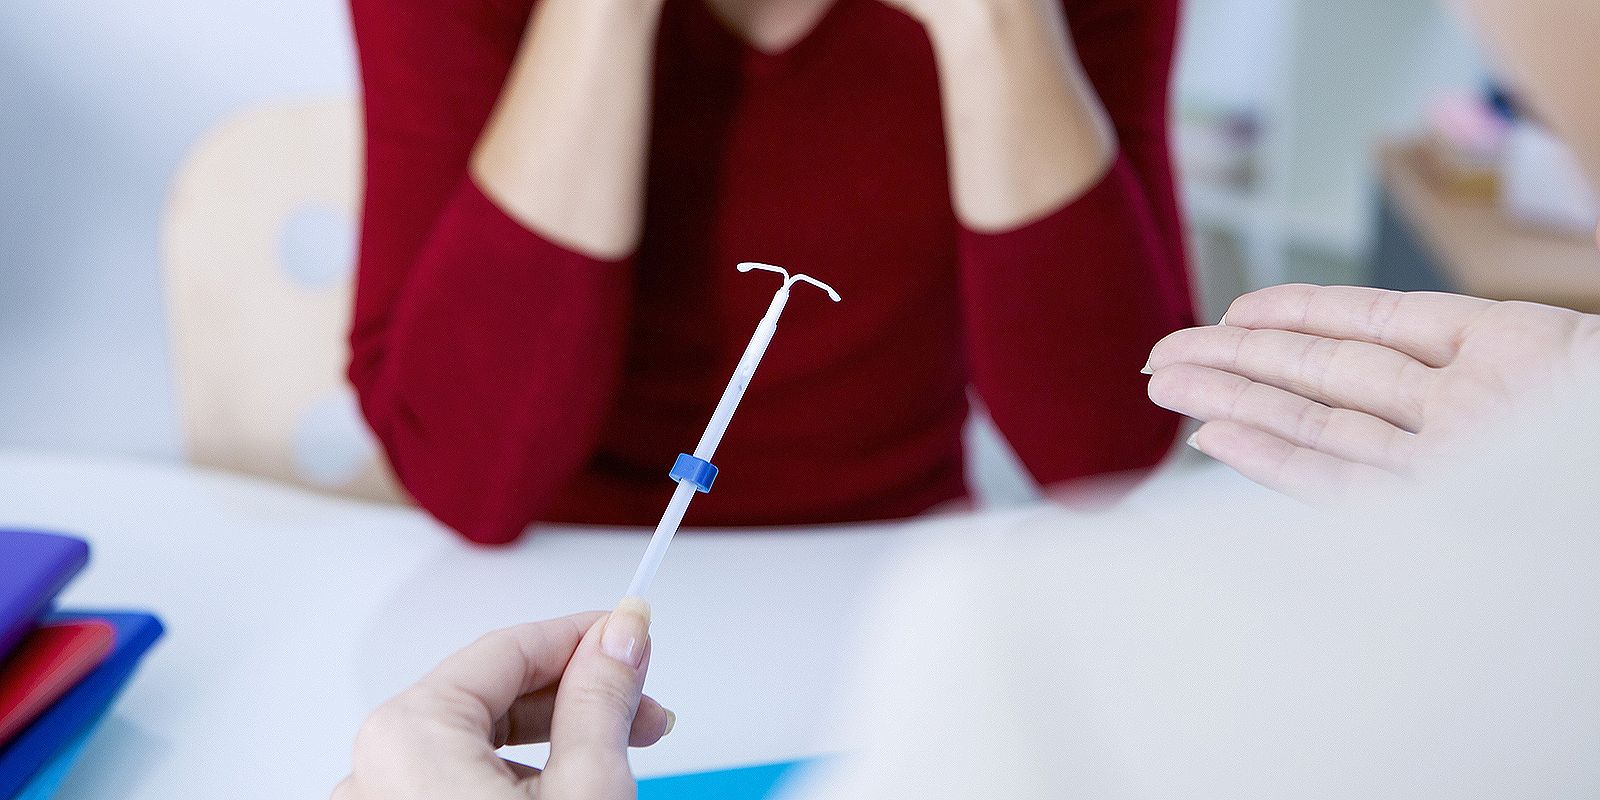
How ADA Compliance Enhances the Public Bathroom Experience for Seniors

0

The accessibility of public spaces has become a crucial indicator of societal progress, especially since there are just over 49 million Americans 65 or older residing in the U.S. Some of these seniors either already have or may develop mobility issues that would make it challenging to use a bathroom created without ADA-compliance in mind.

A fundamental facet of this inclusivity required for seniors lies in the adherence to the Americans with Disabilities Act (ADA) standards, particularly when it comes to public bathrooms. Navigating these spaces can pose unique challenges for seniors, necessitating thoughtful design and accommodation. Let’s learn more about the impact of ADA compliance on the public bathroom experience for seniors.

Accessible Design and Layout

ADA-compliant bathrooms boast designs that prioritize accessibility. For seniors, this means wider entrances to accommodate mobility aids such as walkers or wheelchairs. These bathrooms are equipped with grab bars strategically placed near toilets and sinks, providing seniors with the necessary support to navigate these spaces independently. Furthermore, the layout ensures sufficient space for easy maneuverability, reducing the risk of accidents and improving overall convenience.

ADA-Compliant Shower Stalls & Accessories

ADA-compliant shower stalls are meticulously designed to cater to a diverse range of users, including those with mobility challenges. These showers typically feature roll-in accessibility to ensure seniors with limited mobility can enter and exit the shower area effortlessly. When you purchase ADA roll-in shower stalls for wheelchair access from specialists in accessibility products, you reduce the risk of opting for a product that doesn’t comply with ADA guidelines.

You can strategically place grab bars and seating options to enhance the safety and ease of use of the ADA-compliant shower stalls. These bars offer crucial support for seniors during entry, exit, and bathing. A stable seating option within the shower stall facilitates a more comfortable bathing experience for those who may need to sit while showering.

Non-Slip Flooring and Surfaces

Seniors are more susceptible to slips and falls, especially in wet and slippery environments like bathrooms. ADA-compliant bathrooms address this concern by incorporating non-slip flooring and surfaces. This reduces the risk of accidents and instills a sense of confidence in seniors, encouraging them to use public facilities without the fear of encountering hazardous conditions.

Ergonomic Fixtures and Features

ADA guidelines emphasize the installation of ergonomic fixtures that cater to a diverse range of users, including seniors. This includes toilets with the appropriate height, allowing seniors to sit down and stand up comfortably. Additionally, sinks are designed to be wheelchair-accessible, ensuring seniors with mobility challenges can maintain good hygiene without facing unnecessary obstacles. These thoughtful features contribute to a seamless and dignified bathroom experience for seniors.

Well-Designed Signage

Clear and understandable signage is crucial for guiding seniors through public spaces, including bathrooms. ADA-compliant bathrooms feature signage with large, easy-to-read fonts, high color contrast, and universally recognized symbols. This thoughtful design ensures that seniors can easily locate restrooms, identify gender-specific facilities, and navigate the space confidently, enhancing their overall experience.

Assistive Technology and Innovation

In the scope of ADA compliance, technology is pivotal in enhancing the public bathroom experience for seniors. Innovations such as sensor-activated faucets, automatic hand dryers, and touchless soap dispensers promote hygiene and cater to seniors with limited dexterity or mobility challenges. These technological advancements contribute to a more user-friendly and modern bathroom environment, empowering seniors to engage with public spaces comfortably.

The use of Thymidine Kinase 1 (TK1) in breast cancer monitoring

0

Thymidine Kinase (TK) is an enzyme involved in the synthesis of DNA, and it plays a crucial role in cell proliferation and DNA replication. It has two isoforms – Thymidine Kinase 1 (TK1) and Thymidine Kinase 2 (TK2). In breast cancer patients, sustained cell proliferation is a hallmark of the disease, and elevated TK1 levels have been associated with tumour growth. This has led to the development of the use of TK activity tests to indicate cell proliferation rate and cell turnover, which is used to provide insights into disease development.

In this article, we will review the use of Thymidine Kinase (TK) as a breast cancer biomarker. We will also explore how TK activity is measured in serum or plasma, some practical applications of measurement, and existing alternatives to cancer monitoring.

Thymidine Kinase (TK) as a Breast Cancer Biomarker

TK can be used in disease monitoring for breast cancer patients. There are two isoforms of the enzyme – TK1 and TK2. While they share the same general function of catalysing the phosphorylation of thymidine, they differ in cellular localisation, expression patterns, and physiological roles. In other words, they have different implications within various diseases.

In breast cancer monitoring, the isoform used as a biomarker is TK1. TK1 activity is closely associated with cell proliferation rates, and elevated TK1 levels can be used to evaluate characteristics related to disease progression, such as tumour growth and patient response to treatment.

On the other hand, TK2 is primarily associated with mitochondrial function and the maintenance of mitochondrial DNA (mtDNA). TK2 gene mutations can lead to certain rare genetic disorders, such as mitochondrial DNA depletion syndromes (MDS). In this case, TK2 activity tests are used to monitor and diagnose the condition.

How Thymidine Kinase 1 (TK1) activity is measured

In the context of breast cancer patients, TK1 activity can be measured using various lab techniques. The most common method is through the use of an enzyme-linked immunosorbent assay (ELISA). ELISA can be performed on blood-based samples, such as serum or plasma.

To measure TK1 activity in serum, blood samples are collected from breast cancer patients. ELISA is set up by coating the wells of a microplate with antibodies specific to TK1, and the plate is washed to remove any unbound molecules. When the patient’s blood sample is added to the wells and incubated, any TK1 present in the sample binds to the immobilised antibodies.

Detection antibodies for TK1 are added to the wells, and a sandwich complex is formed (with the target molecule captured between two antibodies). Following this, a secondary detection reagent (such as an enzyme-linked antibody) is added to produce a detectable signal through colorimetric or fluorometric reactions. TK1 presence is then indicated.

Finally, the detectable signal is measured using a plate reader or spectrophotometer, and TK1 activity in the sample can be determined. The level of activity can provide insights into the proliferation rate of cancer cells and tumour burden, which can offer researchers and medical practitioners guidance into treatment approach.

Applications of TK1 activity analysis in disease monitoring

Monitoring TK1 activity levels in patients allows medical practitioners to adapt breast cancer treatment approaches. This can lead to prolonging a patient’s life, reducing the severity of the side effects of their treatment, or both. Below are three main applications of TK1 activity testing:

Treatment Response Assessment

Monitoring TK1 activity during breast cancer treatment provides valuable insights into treatment response. Decreasing TK1 activity levels over the course of treatment may indicate a positive response to therapy, while increasing or persistently high levels may suggest resistance or disease progression. TK1 activity analysis can thus guide treatment decisions, and medical practitioners can facilitate adjustments to optimise patient outcomes.

Predicting Treatment Toxicity

TK1 activity analysis has also shown potential in predicting treatment-related toxicities. Higher TK1 activity level in breast cancer patients before treatment initiation have been associated with increased risk of chemotherapy-induced toxicities, such as haematological toxicity. When patients with high risk are identified, medical practitioners can tailor treatment regimens or adjust dosages to minimise severe side effects.

Minimal Residual Disease Monitoring

Breast cancer patients that have completed primary treatment can have their TK1 activity levels in their blood measured. Analysis can be used to identify the presence of minimal residual disease (MRD) – which refers to small amounts of cancer cells that may remain after treatment. MRD can potentially lead to disease recurrence, and identifying early signs can guide treatment strategies.

Alternatives to TK1 activity testing

In addition to TK1 activity testing, there are other blood-based biomarkers that can be used to monitor breast cancer development, such as CA15-3, CA27.29, and CTCs.

  • CA15-3 is a carbohydrate antigen commonly used as a biomarker for breast cancer, measured through taking a blood sample of the patient. Elevated CA15-3 levels can indicate disease progression and response to treatment. However, CA15-3 is not specific to breast cancer and can also be elevated in other conditions.
  • CA27.29 is another carbohydrate antigen commonly used for breast cancer monitoring, particularly for advanced cancer stages. However, it is not specific to breast cancer either and can be elevated in other non-cancerous conditions, making analysis less clear-cut.
  • Circulating Tumour Cells (CTCs) are cancer cells that have detached from the primary tumour and are circulating in the bloodstream. By detecting CTCs and analysing them, valuable information on tumour biology and treatment response can be obtained as well.

Final words

Thymidine Kinase – and Thymidine Kinase 1 in particular – holds good promise as a valuable biomarker in breast cancer monitoring. Through a minimally invasive sample collection procedure, these blood-based biomarkers provide insight into disease progression, allowing medical practitioners to tailor treatment strategies to improve patient outcomes.

Sick and Struggling: Navigating Financial Challenges without Paid Time Off

0

If you’re sick, stay home. This workplace creed prevents the spread of illness throughout the office, giving you time to recover from the sniffles, a crushing migraine, or even COVID.

Unfortunately, a quarter of Americans struggle to follow this tip when sick days come out of their pocket. According to a Pew Research study, a whopping 24% of workers in the US do not have paid sick days.

Taking unpaid time off while you’re sick can be challenging for your budget. But assuming you have important medical appointments or something contagious, you can’t go to work and power through it.

So, what can you do? Here are some options to help you during this tough financial time.

Tap into Vacation Days

Using your vacation days to cover an illness is annoying, but it’s an easy way to make sure you get paid while you take time to recover.

This isn’t always an option, as employers who don’t supply paid sick leave probably aren’t interested in paying their employees to take holidays either. However, this might be available if you simply run out of sick days during a bad bout of bronchitis or the norovirus.

Talk to your manager about using these days to cover your illness, making sure you emphasize how you’re doing them a favor by staying home. After all, they may be willing to approve your time off when they know you won’t be bringing a contagious illness into the office.

Work from Home

Working from home can be a good compromise for everyone. You can stay home, skipping the tiring commute and work from a comfy pile of blankets. Meanwhile, your coworkers can get your input without worrying about catching your cold.

In the aftermath of the pandemic, a work-from-home setup isn’t the anomaly it once was. Plenty of offices are currently following a hybrid model, which allows employees to work from home half of the week. Talk to your employer about increasing your work-from-home days to help you kick your cold.

Budgeting for Unpaid Time Off

In service-based positions, you might not be able to work from home, and you may not have vacation days at your disposal. That leaves you sacrificing some of your paycheck in order to recover, see doctors, or undergo tests.

The cost of taking unpaid sick time can be hard to handle. According to the Economic Policy Institute, the wages lost from taking three days off is equivalent to losing monthly grocery spending or a household’s monthly utilities budget.

In this scenario, losing the wages you usually rely on to pay bills is a lot like facing an unexpected expense you can’t ignore. In these emergencies, you may consider visiting a website like MoneyKey to learn about emergency installment loans online. Emergency installment loans can give you temporary funds to resolve this payment issue if you know you can repay what you borrow once you get back to work.

Emergency loans are intended as a last resort, so you should focus on building an emergency medical fund if you don’t have paid sick leave. Most experts recommend you have as much as six months of living expenses in this account, but anything can help. Focus on what you need to do to save up the equivalent of three days without pay and go from there.

Bottom Line:

According to the CDC, the average person takes a few days to under two weeks to recover from the flu. That’s a lot of time to go without a paycheck.

If you would struggle to make ends meet with this much time off, consider making a career change in the future. Look at booming fields that promise better benefits, like AI and the cybersecurity industry.

How to Tell How Many Weeks Pregnant You Are: Understanding Pregnancy Weeks

0

You’re eager to know how far along you are, but the variety of methods can be overwhelming. Don’t fret; we’ve got you covered! Whether it’s counting from your last menstrual period or using an ultrasound, we’ll break down the most reliable ways to determine your gestational age. Understanding these techniques will help you accurately track your pregnancy journey and ensure proper prenatal care.

Knowing how many weeks pregnant you are is crucial for monitoring fetal development and preparing for each trimester’s milestones. We’ll guide you through the process, empowering you with knowledge that will ease any uncertainties about calculating your due date. Stay tuned as we simplify this essential aspect of pregnancy!

Key Takeaways

  • Understanding how to calculate your pregnancy weeks is crucial for tracking your baby’s development and ensuring proper prenatal care.
  • Use reliable methods such as ultrasound and last menstrual period to determine the accurate weeks of pregnancy.
  • Knowing your due date is important for planning and preparing for the arrival of your baby.
  • Factors like irregular menstrual cycles or variations in fetal growth can influence the accuracy of the due date calculation.
  • Tracking fetal growth and development through various stages of pregnancy provides valuable insights into the health and well-being of the baby.
  • Seek medical advice if you experience any signs of premature labor to ensure a safe and healthy pregnancy journey.

Understanding Pregnancy Weeks

Average Length

Pregnancy typically lasts around 40 weeks. However, it’s essential to note that this duration can vary. While the standard range is between 37 to 42 weeks, full-term pregnancies usually fall within 39 to 41 weeks. It’s crucial for expectant mothers and healthcare professionals to understand that both premature and post-term pregnancies have different implications.

Premature births, occurring before 37 weeks, may lead to certain health challenges for the baby due to their underdeveloped organs. On the other hand, post-term pregnancies (after 42 weeks) could pose risks such as a larger baby size or complications during delivery.

For instance, if a pregnancy extends beyond 41 weeks, doctors might recommend inducing labor to avoid potential complications associated with post-term births.

ACOG Definition

The American College of Obstetricians and Gynecologists (ACOG) provides comprehensive guidelines on pregnancy duration. These guidelines offer standard recommendations for prenatal care based on the specific week of pregnancy an expectant mother is in.

Healthcare professionals rely on these guidelines from ACOG as they provide valuable insights into managing various stages of pregnancy effectively. Expectant mothers also benefit from this trusted resource by gaining access to reliable information about what they should expect at each stage of their pregnancy journey.

Calculating Pregnancy Due Date

Naegele’s Rule

Naegele’s Rule is a widely used method to estimate the due date based on LMP. It involves adding 7 days to the Last Menstrual Period (LMP), then counting forward 3 months. This simple yet effective calculation tool can provide a rough estimate of the due date, offering expectant mothers and healthcare providers an initial timeline for the pregnancy journey. While it serves as a helpful starting point, it’s important to remember that individual variations in menstrual cycles and conception timing may affect the accuracy of this estimation.

Naegele’s Rule is considered straightforward because it offers a basic way to calculate when your baby might arrive. For instance, if your last period started on January 1st, you would add seven days which brings you to January 8th, then count forward three months – April 8th would be your estimated due date.

This method can be particularly useful for those who are eager to have an initial idea of their due date before consulting with healthcare professionals or undergoing ultrasound examinations. However, it should not be solely relied upon for precise calculations since factors such as irregular menstrual cycles or late ovulation could impact its accuracy.

IVF Transfer Date

For women undergoing in vitro fertilization (IVF), pregnancy is calculated differently compared to natural conception. In these cases, the transfer date marks the beginning of the pregnancy timeline rather than using LMP as in traditional pregnancies. Since IVF pregnancies involve unique considerations regarding due date estimation and fetal development timelines, consulting fertility specialists becomes crucial for accurate calculations.

In IVF pregnancies, instead of relying on Naegele’s rule based on LMP, determining gestational age typically begins from the day embryos are transferred into the uterus during assisted reproductive technology procedures. The healthcare team managing your fertility treatment will play a vital role in guiding you through this process and providing precise information about how many weeks pregnant you are based on your specific circumstances.

It’s essential for individuals undergoing IVF treatments to understand that calculating pregnancy weeks differs from natural conception methods. Seeking guidance from experienced medical professionals specializing in fertility and reproductive health will ensure accurate estimations tailored to each person’s unique situation.

Reverse Calculator

A reverse calculator provides an alternative approach by allowing individuals to determine their conception dates based on either their due dates or ultrasound findings. This tool proves especially beneficial for those seeking more precise insights into their fertility window and wanting clarity about when they may have conceived.

By inputting their estimated due date or ultrasound results into a reverse calculator app or website designed specifically for this purpose, individuals can gain valuable information about potential conception timing with greater precision than traditional methods allow.

Using this tool not only helps expectant parents understand more accurately when they might have conceived but also contributes significantly towards enhancing awareness about personal fertility patterns and reproductive health status.

Methods for Determining Weeks Pregnant

Ultrasound Role

Ultrasounds are essential in confirming pregnancy viability and estimating gestational age. They provide a visual confirmation of fetal development, allowing healthcare providers to accurately determine how many weeks pregnant someone is. Ultrasounds can reveal if there are multiple pregnancies or any developmental abnormalities, providing crucial information for prenatal care.

Furthermore, ultrasounds offer an opportunity for parents to bond with their baby through early images. This bonding experience can be emotionally fulfilling and help the expectant parents feel more connected to their growing child even before birth.

Fundal Height

Another method used to determine how many weeks pregnant someone is involves measuring fundal height. This measurement is taken from the top of the pubic bone to the top of the uterus and serves as an indicator of fetal growth. During regular prenatal visits, monitoring fundal height helps healthcare providers assess whether the fetus is developing properly and following expected growth patterns.

In addition to tracking normal fetal growth, fundal height measurements can also help identify potential issues such as intrauterine growth restriction (IUGR). If a discrepancy between fundal height and expected gestational age is detected, further investigation may be required to ensure the well-being of both mother and baby.

Importance of Knowing Your Due Date

Health Planning

Knowing how many weeks pregnant you are is crucial for health planning. It helps healthcare providers offer the best care and advice based on your stage of pregnancy. For example, in the early stages, they might recommend certain prenatal tests or supplements to ensure a healthy pregnancy.

Understanding your due date also enables you to plan for any necessary lifestyle changes and make adjustments accordingly. This could involve modifying your diet, exercise routine, or work schedule to accommodate the needs of both you and your growing baby.

Furthermore, being aware of how far along you are allows you to prepare emotionally and mentally for the upcoming arrival of your little one. It gives you time to process the changes that lie ahead and seek support if needed.

Partner Support

Another reason why it’s essential to determine how many weeks pregnant you are is partner support. When both partners have a clear understanding of where they are in the pregnancy journey, it fosters better communication and collaboration in making important decisions together.

For instance, knowing the specific week can help partners engage more actively in prenatal appointments or educational classes tailored to that stage of pregnancy. This shared knowledge creates a sense of unity as both individuals become more involved in preparing for parenthood.

Moreover, it allows partners to provide targeted emotional support throughout each trimester by recognizing different milestones and challenges associated with specific weeks during pregnancy.

Ovulation Tracking

Determining how many weeks pregnant involves tracing back from when conception likely occurred – which usually happens around two weeks after ovulation. Understanding this timeline is vital because it provides insight into when fertilization took place relative to ovulation.

Ovulation tracking helps women identify their most fertile days within their menstrual cycle. By pinpointing these days accurately using methods like ovulation predictor kits or fertility awareness techniques, couples trying to conceive can increase their chances of becoming pregnant at an optimal time within this window.

This knowledge not only aids those attempting conception but also assists women who want greater control over family planning through natural birth control methods such as tracking their fertile periods without relying on hormonal contraceptives.

Factors Influencing Due Date Accuracy

Ovulation Tracking

Ovulation tracking is a crucial factor in determining how many weeks pregnant you are. Ovulation usually occurs around the 14th day of a woman’s menstrual cycle. By pinpointing this date, it becomes easier to estimate the gestational age of the fetus and calculate the due date. For example, if a woman tracks her ovulation and finds out she conceived three weeks ago, then she would be considered approximately three weeks pregnant.

Tracking ovulation can be done through various methods such as using an ovulation predictor kit or monitoring changes in cervical mucus and basal body temperature. These methods help women identify their most fertile days, thereby increasing their chances of conceiving. Understanding when conception occurred allows for more accurate dating of the pregnancy.

Another method for tracking ovulation is by using fertility awareness-based methods (FAMs). This involves keeping track of menstrual cycles on a calendar to predict when ovulation might occur based on previous patterns. By knowing when they are most likely to conceive, women can better gauge how far along they are in their pregnancy.

Fetal Development

Understanding fetal development also plays a significant role in determining how many weeks pregnant someone is. After fertilization, it takes about six to seven days for the embryo to implant into the uterus. Once implanted, hormonal changes trigger further development that leads to pregnancy.

During early fetal development, certain milestones occur at specific times which can help determine gestational age accurately. For instance, at around five weeks after conception, the embryo’s heart begins beating; by six weeks, limb buds start forming; and by eight weeks, all major organs have developed.

Ultrasounds play a crucial role in assessing fetal development and estimating gestational age with greater accuracy during prenatal care visits. The size of the fetus and developmental milestones observed through ultrasounds provide healthcare providers with valuable information about how far along someone is in their pregnancy journey.

Tracking Fetal Growth and Development

Milestones

Determining how many weeks pregnant you are is crucial for tracking your baby’s growth and development. Fetal milestones can help estimate the gestational age, offering insights into the baby’s progress. For instance, at around 12 weeks, the fetus has developed all its organs and is now focusing on growing in size. By understanding these milestones, you can roughly calculate how far along you are in your pregnancy.

Pregnancy apps or websites provide detailed information about fetal development week by week. These resources outline key milestones such as when the baby’s heart starts beating (around 6 weeks), when they start kicking (around 18-25 weeks), and when their eyes open (around 26-28 weeks). Keeping track of these significant events helps women get a clearer picture of their pregnancy timeline.

Understanding fetal development also involves recognizing physical changes in the mother’s body that correspond to different stages of pregnancy. For example, during early pregnancy, hormonal changes may cause morning sickness or breast tenderness; whereas later on, a visible baby bump becomes more prominent.

Estimating Conception Date Relationship

Due Date Correlation

To determine how many weeks pregnant you are, understanding the relationship between your due date and conception date is crucial. The due date, also known as the estimated delivery date (EDD), is calculated by adding 280 days (or 40 weeks) to the first day of your last menstrual period (LMP). This method assumes that ovulation occurs around two weeks after the start of a woman’s menstrual cycle. It’s important to note that this calculation may not be accurate for everyone, especially if their menstrual cycles are irregular.

Calculating your due date based on your LMP can give you an estimate of when you conceived. However, it doesn’t account for variations in individual menstrual cycles or the exact timing of ovulation. For example, if a woman has a longer menstrual cycle or ovulates later than average, her conception might have occurred later than expected based on her LMP. Therefore, while calculating from LMP provides an initial estimation, it might not accurately reflect how many weeks pregnant she truly is.

Another way to correlate due dates and conception dates involves medical imaging techniques such as ultrasounds. By measuring fetal size during an ultrasound scan early in pregnancy, healthcare providers can estimate gestational age more accurately and adjust the EDD accordingly.

Reverse Calculation

Reverse calculation offers another method to determine how many weeks pregnant someone is by estimating their conception date rather than relying solely on their due date. This approach involves subtracting 266 days from the current gestational age in days to find an approximate conception date.

For instance:

  • If someone has been pregnant for 120 days (approximately 17 weeks), subtracting 266 from this number would indicate a rough conception time around 146 days ago.
  • While reverse calculation can provide insight into when fertilization likely occurred, it’s essential to remember that embryonic development varies among pregnancies.
  • Factors like sperm survival time and variability in egg release timings mean that pinpointing an exact moment of fertilization isn’t always precise using reverse calculations alone.

Role of Ultrasound in Pregnancy Tracking

Estimating Due Date

Ultrasounds play a crucial role. During the first trimester, healthcare providers often use ultrasound measurements to determine the gestational age of the fetus. By measuring the size of the embryo or fetus, they can accurately estimate how many weeks pregnant you are and predict your due date. This is calculated by comparing the size of the fetus with standard growth charts.

Ultrasounds are also used to confirm or adjust estimated due dates if there is uncertainty about when conception occurred. For example, if there’s a discrepancy between your last menstrual period and your ultrasound dating, healthcare providers may rely on ultrasound measurements for a more accurate estimation.

In some cases, additional ultrasounds may be performed later in pregnancy to track fetal growth and ensure that everything is progressing as expected. These periodic scans help monitor any potential issues that could affect both maternal and fetal health.

Monitoring Progress

Throughout pregnancy, regular ultrasounds are used for monitoring progress by checking on various aspects of fetal development such as heartbeat rate, position in the uterus, placental health, amniotic fluid levels, and overall growth patterns. These assessments provide valuable insights into how well your baby is developing within each stage of pregnancy.

For instance, during early ultrasounds (around 6-10 weeks), healthcare providers focus on confirming intrauterine pregnancy and detecting multiple pregnancies while assessing embryonic development. As pregnancy progresses into later stages (18-22 weeks), detailed anatomy scans help evaluate major organs like heart, brain, spine along with limbs’ length and head circumference.

Moreover, monitoring via ultrasounds enables healthcare professionals to identify any potential complications such as ectopic pregnancies or miscarriages early on so that appropriate measures can be taken promptly.

Preparing for Early Pregnancy Stages

Health Tips

Understanding how to tell how many weeks pregnant you are is crucial for ensuring a healthy pregnancy. One of the most reliable ways to determine this is by tracking your menstrual cycle. Typically, a woman ovulates around two weeks after the first day of her period. By counting from the first day of your last period, you can estimate how far along you are in your pregnancy.

Another important factor in determining the number of weeks pregnant you are is visiting a healthcare professional. They will use various methods such as ultrasound scans and physical examinations to accurately assess the stage of your pregnancy. These medical assessments provide precise information about fetal development and gestational age.

It’s essential to remember that each woman’s body is unique, so different factors can affect how many weeks pregnant someone may be at any given time. Factors such as irregular periods or not being sure of the date of their last period can make it challenging for some women to accurately gauge their stage of pregnancy without medical assistance.

Seeking prenatal care early on in your pregnancy journey also plays a pivotal role in understanding how far along you are. Regular check-ups with healthcare providers will help monitor fetal growth and development, which directly impacts knowing how many weeks pregnant one might be.

Emotional Support

Pregnancy brings about significant emotional changes, and receiving adequate support during this time is crucial for both mental well-being and overall health during these early stages. It’s common for expectant mothers to experience feelings ranging from excitement and joy to anxiety and fear as they navigate through their pregnancies.

Having open conversations with loved ones or joining support groups specifically tailored for expectant mothers can provide immense emotional support during this time. Sharing experiences with others who have been through similar situations can alleviate anxieties related to uncertainties about pregnancy week calculation or other concerns regarding early stages of motherhood.

Moreover, maintaining a healthy lifestyle encompassing regular exercise, proper nutrition, sufficient rest, and stress management techniques contributes significantly towards emotional well-being during these initial stages of pregnancy.

Recognizing Premature Labor Signs

Early Symptoms

Feeling unsure about how to tell how many weeks pregnant you are can be common, especially during the early stages of pregnancy. However, recognizing premature labor signs is crucial for ensuring a healthy pregnancy. Some early symptoms that may indicate premature labor include abdominal cramping, which feels like menstrual cramps, and lower back pain that comes and goes. Experiencing a change in vaginal discharge such as an increase in amount or a change in consistency could also be an indicator. It’s important to note any unusual sensations such as pressure in the pelvis or abdomen.

Another key symptom is having regular contractions that occur every 10 minutes or more frequently. These contractions may feel like tightening across the abdomen and might even cause discomfort or pain. If you experience any of these symptoms before reaching 37 weeks gestation, it’s essential to seek medical attention promptly.

It’s important to remember that not all abdominal discomfort during pregnancy indicates preterm labor; however, being aware of these potential warning signs can help expectant mothers take appropriate action if necessary.

Preventive Measures

There are several measures expectant mothers can take:

  1. Regular Prenatal Care: Attending scheduled prenatal appointments allows healthcare providers to monitor both the mother’s health and the baby’s development closely.
  2. Healthy Lifestyle Choices: Maintaining a balanced diet rich in essential nutrients helps support fetal growth and development while reducing the risk of complications associated with preterm birth.
  3. Avoiding Harmful Substances: Steering clear of alcohol, tobacco smoke, illicit drugs, and certain medications is crucial for promoting a healthy pregnancy.
  4. Managing Stress: Engaging in relaxation techniques such as deep breathing exercises or prenatal yoga can help manage stress levels which may contribute to preterm labor.
  5. Identifying Risk Factors Early: Understanding personal risk factors for preterm birth enables expectant mothers to work closely with their healthcare providers on tailored preventive strategies.

Enhancing Pregnancy Experience

Lifestyle Adjustments

Pregnancy is an exciting and transformative time in a woman’s life. Making certain lifestyle adjustments can help ensure a healthy pregnancy. One important aspect is keeping track of how many weeks pregnant you are. This allows you to monitor your baby’s development and prepare for the upcoming changes.

Eating a balanced diet rich in nutrients like folic acid, iron, and calcium supports the growth of your baby and keeps you healthy during pregnancy. Regular exercise such as walking or swimming helps manage weight gain and improves overall well-being. Another crucial lifestyle adjustment is getting enough rest; adequate sleep aids in the body’s recovery process.

It’s essential to avoid harmful substances such as alcohol, tobacco, and illicit drugs during pregnancy as they can harm the developing fetus. Furthermore, reducing stress through relaxation techniques like deep breathing exercises or prenatal yoga positively impacts both mother and baby.

Maintaining regular prenatal check-ups with healthcare professionals ensures that any potential issues are identified early on.

Medical Advice

Seeking medical advice from healthcare providers plays a pivotal role in monitoring the progress of your pregnancy accurately. Healthcare professionals use various methods to determine how far along you are in your pregnancy.

One common method used by doctors to calculate gestational age is through ultrasound examinations which provide detailed images of the fetus inside the womb. The measurements obtained from these ultrasounds help determine fetal age accurately.

Another way medical professionals estimate gestational age is by calculating it based on the date of your last menstrual period (LMP). By tracking this information alongside other factors like cycle length, physicians can approximate how many weeks pregnant you are.

In some cases, additional tests may be conducted if there are uncertainties about gestational age due to irregular periods or other factors affecting menstrual cycles.

Conclusion

Closing Thoughts

You’ve now gained a solid understanding of how to calculate and track your pregnancy weeks. Knowing your due date, understanding fetal development, and recognizing signs of premature labor are crucial for a healthy pregnancy journey. As you prepare for the early stages of pregnancy, remember that accurate information about your pregnancy weeks empowers you to make informed decisions about your health and the well-being of your baby.

Take charge of your pregnancy journey by applying the methods discussed here. Stay proactive in tracking your pregnancy weeks, seek medical advice when needed, and embrace each stage with confidence. Your active involvement will not only enhance your experience but also contribute to a healthier outcome for both you and your little one.

Frequently Asked Questions

How can I accurately determine how many weeks pregnant I am?

To accurately determine the number of weeks you are pregnant, count from the first day of your last menstrual period. This method is commonly used by healthcare providers and provides a good estimation of your pregnancy duration.

Is it essential to know my due date during pregnancy?

Knowing your due date is crucial as it helps you plan for prenatal care and prepare for childbirth. It also allows healthcare providers to monitor your baby’s growth and development more effectively.

What factors can influence the accuracy of determining my due date?

Several factors can affect the accuracy of determining your due date, including irregular menstrual cycles, variations in fetal growth rates, and individual differences in ovulation timing. Discuss any uncertainties with your healthcare provider.

How does an ultrasound help track pregnancy progression?

Ultrasounds play a vital role in tracking fetal development and estimating gestational age. They provide detailed images that allow healthcare professionals to assess the baby’s growth, confirm the due date, and identify any potential concerns or complications.

What are some signs that may indicate premature labor during pregnancy?

Signs of premature labor include regular contractions before 37 weeks, lower back pain or pressure, abdominal cramping, vaginal bleeding or spotting, a change in vaginal discharge consistency (watery or mucus-like), pelvic pressure sensation, or flu-like symptoms. If you experience these symptoms, seek medical attention promptly.

Prevention of Razor Bumps: Effective Strategies and Remedies

Struggling with razor bumps can be frustrating, but fear not! We’ve got your back. Say goodbye to the days of dealing with post-shave irritation and hello to smooth, bump-free skin. In this guide, we’ll dive into effective skin care tips and tricks for preventing those pesky razor bumps from ruining your shaving experience.

From choosing the right shaving products to mastering the proper shaving techniques, we’ve got all the insider knowledge you need to keep those unsightly bumps at bay. Whether you’re a seasoned pro or new to the world of grooming, our comprehensive approach will help you achieve a seamless shave every time. Get ready to bid farewell to razor bumps and welcome a new era of smooth, flawless skin.

Key Takeaways

  • Prevention is Key: Understanding the causes of razor bumps and differentiating them from other skin irritations is crucial for effective prevention.
  • Personalized Prevention: Identifying individual risk factors and implementing tailored prevention strategies can significantly reduce the occurrence of razor bumps.
  • Immediate Relief: Quick and effective remedies can alleviate discomfort and prevent worsening of razor bumps.
  • Consulting Professionals: Seeking medical interventions and professional advice when needed is essential for severe or persistent razor bumps.
  • Home Care Matters: Home treatments can be effective in managing razor bumps, but it’s important to assess their efficacy and seek professional help if needed.
  • Holistic Approach: Lifestyle adjustments and aftercare play a vital role in preventing and managing razor bumps for long-term skin health.

Understanding Razor Bumps

Causes

Prevention of Razor Bump 2

Razor bumps, also known as shave bumps, can occur due to friction from shaving. When the hair is cut at an angle and grows back into the skin, it leads to curly hair re-entering the skin, causing irritation. Improper shaving techniques, such as going against the grain or using too much pressure, can also contribute to razor bumps. Some individuals may have skin sensitivity to razor blades, leading to inflammation and redness after shaving. Using dull razors increases the likelihood of developing razor bumps.

When curly hair re-enters the skin after being shaved, it causes irritation and leads to razor bumps. For example, individuals with tightly curled hair are more prone to this issue.

Improper shaving techniques like going against the direction of hair growth or applying excessive pressure can result in razor bumps.

Symptoms

The symptoms of razor bumps include redness and inflammation, small raised bumps on the skin’s surface, itchiness and discomfort, pus-filled blisters in severe cases, and hyperpigmentation (darkening of the affected area).

Individuals experiencing razor bumps often notice redness and inflammation on their skin along with small raised bumps that cause itchiness.

Typical Locations

Razor bumps commonly appear on specific areas depending on gender – for men, they typically occur on their face and neck; for women, they are common in the bikini area. However,razor bumpscan develop anywhere that has been shaved including underarms

Men usually experience these irritations around their face while women often encounter them in their bikini area post-shaving.

Healing Timeframe

The healing timeframe for razor bumps varies based on severity but usually resolves within a few days if treated properly. However,if left untreated,rasheshave been known topersist for weeksand even leadto scarringif chronic

Differentiating Skin Irritations

Razor Bumps vs. Burns

Razor bumps are raised, while burns are flat. The raised nature of razor bumps is due to the hair re-entering the skin, causing inflammation. On the other hand, burns are caused by friction or chemical irritation and may result in immediate pain upon occurrence. In contrast, razor bumps can be itchy and inflamed, leading to discomfort over time.

Razor bumps occur when shaved hair grows back into the skin, causing it to become inflamed and irritated. This often leads to the development of small, raised bumps on the skin’s surface. Conversely, burns from shaving can arise due to various reasons such as using a dull blade or applying too much pressure during shaving.

When comparing these two types of irritations, it’s important for individuals to recognize that each requires different treatment approaches based on their distinct characteristics. Understanding these differences enables individuals to adopt appropriate measures for addressing each issue effectively.

Bumps vs. Ingrown Hairs

Bumps resulting from shaving represent inflamed follicles due to hair re-entering the skin after being cut off at an angle during shaving. In contrast, ingrown hairs occur when newly grown hairs curl back into the skin instead of rising up vertically out of it like normal hairs do after being cut.

Both conditions can cause discomfort and redness in affected areas; however, ingrown hairs may lead to pus-filled bumps forming under the skin’s surface if left untreated for an extended period of time. It’s also noteworthy that razor bumps can develop even without ingrown hairs present on the affected area.

Understanding these distinctions between razor bump-related irritations and those arising from ingrown hairs is crucial for implementing targeted preventive measures and treatments tailored specifically toward each condition’s unique characteristics.

When dealing with any type of skin irritation, whether it be razor bumps or ingrown hairs-related issues, recognizing their specific attributes facilitates better management strategies aimed at alleviating symptoms effectively.

Risk Factors Identification

Skin Type

The prevention of razor bumps heavily depends on understanding your skin type. For instance, oily skin is more prone to clogging pores, making it susceptible to razor bumps. On the other hand, individuals with dry skin may experience more irritation during shaving due to lack of moisture. Moreover, people with sensitive skin tend to react strongly to shaving products and techniques. Those with combination skin, which requires balanced care for different areas of the face, should be mindful of their specific needs when preventing razor bumps. Lastly, individuals with normal skin are less likely to develop razor bumps but still need proper preventive measures.

Several factors come into play. Individuals with curly hair are more likely to experience ingrown hairs after shaving due to the natural curl pattern that can cause hairs to grow back into the skin. Those with coarse hair may encounter increased friction during shaving as compared to people with fine or straight hair textures. While people with fine hair might think they’re in the clear regarding razor bumps, they still need preventative measures since any type of hair can lead to these issues.

Hair Texture

Understanding how your specific hair texture interacts with shaving is crucial for effective prevention of razor bumps.

Shaving frequency also plays a significant role in avoiding razor bumps. Shaving too frequently can lead to irritation and increase the likelihood of developing these pesky little blemishes on your skin’s surface.

Hydration is key when it comes down preventing those annoying post-shave redness and inflammation known as “razor burn.” Ensuring that your skin is properly hydrated before you shave helps protect against irritation caused by friction between the blade and your dry or dehydrated epidermis.

Prevention Strategies

Pre-Shave Preparation

Preventing razor bumps starts with effective pre-shave preparation. One crucial aspect of this is hydration. Keeping the skin well-hydrated before shaving can help soften the hair and make it easier to cut, reducing the likelihood of razor bumps. Using a warm towel or taking a shower before shaving can effectively hydrate the skin and hair follicles, making for a smoother shave.

Another important step in pre-shave preparation is exfoliation. This process involves removing dead skin cells from the surface of the skin, which can help prevent ingrown hairs and razor bumps. Gentle exfoliation using a mild scrub or exfoliating brush can clear away any debris that may block hair follicles, reducing the risk of irritation after shaving.

It’s essential to note that over-exfoliation can cause irritation and lead to more razor bumps, so it’s crucial to strike a balance and not be too aggressive with this process.

Proper pre-shave preparation sets up your skin for a smooth shaving experience while minimizing potential irritations such as razor bumps.

Right Shaving Tools

Selecting the right shaving tools plays an integral role in preventing razor bumps. Opting for sharp, high-quality razors helps ensure clean cuts without tugging at hairs or causing unnecessary friction on the skin. Dull blades are more likely to pull at hairs rather than cutting them cleanly, leading to increased chances of developing razor bumps.

Choosing single-blade razors over multi-blade ones might be beneficial for some individuals as they reduce instances of hair being pulled back into the skin during shaving (known as “shaving trauma”), which often leads to ingrown hairs and subsequent razor bump formation.

Furthermore, electric shavers with adjustable settings allow users greater control over how close they want their shave to be without irritating their skin excessively – another factor that contributes significantly towards preventing post-shave complications like razor bumps.

Proper Techniques

Employing proper shaving techniques is key in averting razor bumps. It’s essential always to shave in the direction of hair growth rather than against it; this minimizes irritation by reducing friction between blade and hair shafts during each pass. Shaving against hair growth increases risks of pulling hairs out unevenly from their follicles instead of slicing them cleanly at surface level – leading directly towards higher occurrences of both redness and painful raised areas known as pseudofolliculitis barbae (PFB).

Moreover, avoiding applying excessive pressure while shaving also lessens chances for developing these unsightly blemishes; allowing gravity do most work when guiding blade across face ensures minimal force applied onto sensitive facial structures where these conditions tend form most frequently – especially around neck area where PFB tends manifest itself worst due its curvier nature compared rest head region!

Lastly but equally importantly: rinsing off remaining lather thoroughly after every stroke prevents buildup underneath blades themselves – ensuring no stray clumps come between you achieving desired results free from pesky imperfections caused by poor hygiene practices during grooming routine!

Post-Shave Care

After completing your shave routine successfully following all aforementioned steps meticulously throughout entire session until very end comes time take care what remains afterwards: proper post-shave care. This includes cleansing shaved areas gently yet thoroughly using lukewarm water followed immediately thereafter application soothing aftershave lotion/cream containing ingredients such witch hazel chamomile extracts soothe irritated surfaces whilst simultaneously providing antiseptic protection against potential infections arising due micro-cuts incurred inadvertently upon contact sharp objects like razors themselves!

Immediate Remedies

Natural Oils

When dealing with the prevention of razor bumps, natural oils can be incredibly effective. Tea tree oil is known for its anti-inflammatory and antimicrobial properties, which can help soothe irritated skin and prevent infection. Coconut oil is another excellent option due to its moisturizing and antibacterial qualities. These natural oils can be applied directly to the affected area after shaving to reduce inflammation and promote healing.

Another beneficial natural oil is aloe vera, which has soothing properties that can alleviate razor burn and redness. Applying a thin layer of pure aloe vera gel on the skin post-shave can provide relief from irritation caused by razor bumps.

witch hazel is an astringent derived from the witch hazel shrub that possesses anti-inflammatory properties, making it an effective solution for reducing swelling associated with razor bumps. It also helps cleanse the skin, preventing further irritation or infection.

Compresses Usage

Utilizing warm compresses is an accessible and efficient way to address razor bumps immediately after shaving. A warm washcloth soaked in hot water (not scalding) can be gently pressed against the affected area for several minutes. This process helps open up pores, allowing trapped hairs to surface while reducing inflammation.

Moreover, applying a cold compress using ice wrapped in a cloth or a ready-made cold pack can constrict blood vessels, diminishing redness and swelling caused by razor bumps. The cold temperature also provides relief from any discomfort or itching associated with these irritations.

Exfoliants Incorporation

Incorporating exfoliants into your skincare routine post-shaving aids in preventing ingrown hairs that lead to pesky razor bumps. Using products containing gentle exfoliating ingredients such as salicylic acid or mild fruit acids helps remove dead skin cells that clog hair follicles, reducing the likelihood of developing ingrown hairs.

Physical exfoliation through gentle scrubbing with products like sugar scrubs or loofahs assists in freeing trapped hairs beneath the skin’s surface while eliminating debris that contributes to inflammation.

Regularly utilizing these immediate remedies not only addresses existing razor bumps but also aids in preventing their recurrence by maintaining healthy skin condition post-shave.

Medical Interventions

Severe Cases

When razor bumps become severe, it’s crucial to seek medical attention. In such cases, the skin may be infected and inflamed, leading to painful and unsightly bumps. If you notice persistent razor bumps that do not improve with home remedies or if they are accompanied by pus or extreme discomfort, it’s time to consult a dermatologist.

Severe cases of razor bumps might require professional intervention in order to prevent further complications. Dermatologists can provide targeted treatments for stubborn razor bumps that don’t respond to over-the-counter solutions. They can also offer valuable advice on how to alter your shaving routine to minimize the risk of future occurrences.

In some instances, severe razor bump outbreaks may necessitate more aggressive interventions such as laser therapy or surgical procedures. These advanced treatments target the root cause of the problem and can provide long-term relief from recurring razor bumps.

Dermatological Treatments

Dermatological treatments play a pivotal role in addressing persistent razor bump issues. One common approach is chemical exfoliation using alpha hydroxy acids (AHAs) or beta hydroxy acids (BHAs). These compounds help remove dead skin cells and unclog hair follicles, reducing the likelihood of ingrown hairs and subsequent razor bumps.

Another effective dermatological treatment is corticosteroid injections directly into particularly inflamed razor bump areas. This method helps reduce inflammation and alleviate discomfort associated with severe cases of razor bumps.

Dermatologists may recommend regular sessions of microdermabrasion or laser hair removal for individuals prone to frequent bouts of ingrown hairs and razor bumps. These procedures aim to eliminate existing ingrown hairs while preventing new ones from forming.

Prescription Medications

Prescription medications are often necessary for managing chronic razor bump conditions that do not respond adequately to other interventions. Topical retinoids like tretinoin are commonly prescribed by dermatologists as they promote cell turnover and prevent hair follicle blockages, reducing the occurrence of ingrown hairs.

Antibiotics may be prescribed when an infection has developed within a particularly stubborn cluster of razor bumps. Oral antibiotics can effectively combat bacterial growth within these lesions while minimizing the risk of spreading infections across larger areas of skin.

For individuals dealing with chronic inflammation due to recurrent episodes of razor bump, oral anti-inflammatory medications might be recommended by healthcare professionals.

Alternative Hair Removal

Techniques Exploration

Exploring different hair removal techniques is essential. One popular method is using an electric razor instead of a traditional blade. Electric razors are designed to cut the hair at skin level, reducing the likelihood of ingrown hairs and razor bumps. Another technique worth considering is waxing, which removes hair from the root, leading to smoother regrowth and minimizing the risk of bumps.

hair removal creams can be used as an alternative method for preventing razor bumps. These creams contain chemicals that dissolve the hair at skin level without causing irritation or ingrown hairs. Furthermore, laser hair removal has gained popularity due to its long-term effectiveness in reducing hair growth, thus decreasing the chances of developing razor bumps over time.

It’s important to note that each individual may respond differently to various techniques based on their skin type and sensitivity. Therefore, experimenting with different methods under professional guidance can help determine which approach works best for preventing razor bumps.

Reducing Shaving

Reducing shaving frequency plays a crucial role in preventing razor bumps. By allowing more time between shaves, individuals give their skin a chance to recover from any potential irritation caused by frequent shaving. This also helps prevent ingrown hairs from forming and reduces the risk of developing unsightly razor bumps.

Moreover, using sharp blades during shaving minimizes friction against the skin’s surface while cutting through the hair effectively. Dull blades can cause uneven cuts and lead to irritation or inflammation post-shave. Regularly replacing old blades with new ones ensures a smooth shave without causing damage or trauma to the skin.

In addition to this preventive measure, maintaining proper skincare routines after shaving is vital for ensuring healthy and bump-free skin. Applying soothing aftershave lotions or gels containing ingredients like aloe vera or tea tree oil helps calm any redness or irritation caused by shaving while keeping pores clean and free from infection-causing bacteria.

Lastly, exfoliating regularly aids in removing dead skin cells that could potentially clog pores and contribute to ingrown hairs—thus playing a significant role in avoiding razor bumps altogether.

Home Treatments Efficacy

Aloe Vera and Oils

Aloe vera and oils are natural remedies that can be effective in preventing razor bumps. Aloe vera has soothing properties that can help reduce inflammation and redness, while oils like coconut oil or tea tree oil have antibacterial and moisturizing benefits.

Using aloe vera gel directly on the affected area after shaving can provide relief from razor bumps. The gel helps to calm the skin, reducing irritation caused by ingrown hairs. Similarly, applying a small amount of coconut oil or diluted tea tree oil can help keep the skin hydrated and prevent bacteria from causing infections.

When using aloe vera or oils for preventing razor bumps, it’s important to ensure that the products used are pure and free from added chemicals or fragrances. These natural remedies work best when applied immediately after shaving to soothe the skin before any irritation occurs.

Applying these natural remedies consistently over time may help in reducing the occurrence of razor bumps, especially for individuals with sensitive skin prone to irritation after hair removal.

Benzoyl Peroxide

Benzoyl peroxide is an over-the-counter medication commonly used to treat acne but also shows promise in preventing razor bumps. This topical treatment works by reducing inflammation, unclogging pores, and killing bacteria on the skin’s surface.

When used as a preventive measure for razor bumps, benzoyl peroxide can effectively target ingrown hairs by exfoliating the top layer of skin cells. By doing so, it helps prevent hair follicles from becoming trapped beneath the surface of the skin—reducing their likelihood of developing into painful razor bumps.

It’s essential to use benzoyl peroxide as directed since excessive use may lead to dryness or peeling of the skin. Individuals should start with lower concentrations (2.5% – 5%) before gradually increasing if necessary based on their tolerance levels.

For those prone to frequent occurrences of razor bumps after shaving, incorporating benzoyl peroxide into their skincare routine could significantly minimize this issue over time.

Colloidal Oatmeal

Colloidal oatmeal is another effective home remedy for preventing razor bumps due to its anti-inflammatory properties that soothe irritated skin post-shaving. It forms a protective barrier on your body’s largest organ—the epidermis—sealing in moisture without clogging pores.

Incorporating colloidal oatmeal into one’s post-shave routine involves creating an oatmeal paste mixed with water then applying it gently onto freshly shaven areas. The application should be left on for several minutes before rinsing off thoroughly with lukewarm water. This process allows colloidal oatmeal’s calming effects ample time to penetrate your pores’ openings while simultaneously hydrating your dermal layers.

Regularly using colloidal oatmeal treatments following each shave might lead towards fewer instances of unsightly redness resulting from inflamed hair follicles.

Professional Help and Advice

When to Seek Help

If you’ve tried various home treatments but still struggle with the prevention of razor bumps, it may be time to seek professional help. Persistent razor bumps can be frustrating, and in some cases, they may indicate an underlying skin condition that requires medical attention. If you notice that your razor bumps are not improving despite consistent home care, or if they seem to be getting worse over time, it’s advisable to consult a dermatologist.

Seeking help from a professional doesn’t mean you’ve failed at managing your skin; rather, it shows that you’re proactive about finding a suitable solution for your concerns. Dermatologists specialize in diagnosing and treating various skin conditions, including razor bumps. They can provide personalized guidance on how to prevent and manage these pesky bumps effectively.

It’s essential to remember that everyone’s skin is unique, so what works for one person might not work for another. A dermatologist can assess your specific situation and offer tailored tips based on their expertise and experience. By seeking professional advice early on, you can potentially save yourself from prolonged discomfort caused by persistent razor bumps.

Dermatologist Consultation

When scheduling a consultation with a dermatologist regarding the prevention of razor bumps, prepare by documenting any home treatments or products you’ve used previously. This information will give the dermatologist valuable insight into what has been effective or ineffective in managing your condition.

During the consultation, the dermatologist will likely examine your skin closely to evaluate the severity of the razor bump outbreak and identify any signs of infection or inflammation. Based on their assessment, they may recommend specific skincare products designed to minimize irritation during shaving or prescribe medication if necessary.

One advantage of consulting with a dermatologist is gaining access to prescription-strength treatments that aren’t available over-the-counter. For example, topical corticosteroids may be prescribed for severe cases of razor bumps when other methods have proven ineffective.

In addition to prescribing medications or recommending specialized skincare products, dermatologists can also provide long-term guidance on preventing future occurrences of razor bumps through proper shaving techniques and aftercare routines tailored specifically for your skin type.

Aftercare Importance

Moisturizing Benefits

Moisturizing is essential for the prevention of razor bumps. When the skin is dry, it becomes more prone to irritation and ingrown hairs. Applying a moisturizer after shaving helps to keep the skin hydrated, reducing the likelihood of razor bumps. Look for a moisturizer that contains aloe vera or witch hazel, as these ingredients have soothing properties that can help calm irritated skin.

Regular use of a gentle, fragrance-free moisturizer can also improve the overall health and condition of your skin, making it less susceptible to irritation from shaving. It’s important to choose products specifically formulated for sensitive areas like the face or bikini line.

Keeping your skin well-moisturized not only reduces the risk of developing razor bumps but also promotes smoother, healthier-looking skin over time. By maintaining proper hydration levels in your skin, you create an environment less conducive to inflammation and ingrown hairs.

Preventing Recurrence

To prevent recurrence of razor bumps, it’s crucial to adopt good shaving habits and techniques. Always shave in the direction of hair growth using a clean, sharp blade to minimize irritation and reduce friction on the skin surface. Using too much pressure while shaving can lead to micro-cuts and subsequent inflammation, increasing the likelihood of developing razor bumps.

Another key factor in preventing recurrence is exfoliation. Regularly exfoliating your skin helps remove dead cells that could potentially clog hair follicles during regrowth after shaving. This simple step can significantly reduce the occurrence of ingrown hairs and subsequent razor bumps.

Furthermore, avoiding tight clothing immediately after shaving can help prevent irritation by allowing air circulation around freshly shaved areas. Proper post-shave care involves applying an alcohol-free aftershave product with soothing ingredients such as chamomile or tea tree oil—these components possess anti-inflammatory properties that aid in calming any potential redness or irritation caused by shaving.

In addition:

  • Consider using electric razors instead of traditional blades if you are prone to developing razor bumps.
  • Avoid stretching or pulling on your skin while shaving as this increases friction and raises chances for irritations.
  • Opt for natural fiber clothing like cotton instead of synthetic materials which may cause further friction against recently shaved areas.

By incorporating these practices into your post-shaving routine regularly, you’ll be able maintain healthy looking smooth skin without having worry about recurring razor bump issues.

Lifestyle Adjustments

Shaving Alternatives

Exploring alternative methods of hair removal can be beneficial. For individuals prone to razor bumps, using electric razors or depilatory creams instead of traditional razors can help minimize skin irritation. These alternatives work by removing hair without the need for a blade, reducing the likelihood of ingrown hairs and subsequent razor bumps.

Using an electric razor is a convenient way to achieve a close shave without direct contact between the blades and the skin. This reduces the risk of irritation and minimizes the chances of developing razor bumps. Depilatory creams contain chemicals that dissolve hair at the root, preventing it from growing back as quickly as shaving does. This method also helps in avoiding ingrown hairs and associated skin issues.

Another effective alternative is waxing, which removes hair from the root rather than cutting it at skin level like shaving does. By pulling hair out from its follicle, waxing allows new growth to come through cleanly without getting trapped beneath the surface of the skin. This significantly decreases instances of razor bumps caused by ingrown hairs.

Frequency Reduction

Reducing how often you shave is another crucial strategy in preventing razor bumps. Shaving less frequently gives your skin time to heal between sessions and lowers your chances of developing irritation or ingrown hairs that lead to unsightly razor bumps.

Allowing more time between shaves enables existing razor bump scars to heal while giving any irritated areas on your skin a chance to recover fully before undergoing another round with sharp blades or harsh chemicals found in some depilatory creams.

Moreover, adjusting your grooming habits by opting for longer intervals between shaves can lead to healthier-looking skin overall since frequent shaving may cause dryness and sensitivity due to constant exfoliation caused by blade contact with delicate facial or body areas.

Closing Thoughts

You’ve now gained a comprehensive understanding of razor bumps, from their causes and risk factors to effective prevention and treatment strategies. By recognizing the difference between skin irritations and implementing suitable prevention methods, you can significantly reduce the occurrence of razor bumps. Remember, immediate remedies and medical interventions are available if needed, but proactive prevention is always the best approach.

Now that you’re equipped with this knowledge, take charge of your skincare routine and make informed decisions about hair removal methods. Experiment with alternative techniques and home treatments to find what works best for your skin. Don’t forget the significance of aftercare and lifestyle adjustments in maintaining smooth, bump-free skin. Stay proactive, stay informed, and say goodbye to razor bumps for good!

Frequently Asked Questions

What causes razor bumps?

Razor bumps are caused by hair that curls back into the skin, leading to inflammation and irritation. This often occurs after shaving when the hair is cut at an angle and grows into the surrounding skin.

How can I prevent razor bumps?

To prevent razor bumps, consider using a sharp razor, shaving in the direction of hair growth, and using shaving cream or gel to lubricate your skin. Exfoliating before shaving can help remove dead skin cells and reduce the likelihood of ingrown hairs.

Are there immediate remedies for razor bumps?

Applying a warm compress or using over-the-counter hydrocortisone cream can help reduce inflammation associated with razor bumps. Aloe vera gel or tea tree oil may also provide soothing relief.

When should I seek professional help for razor bumps?

If you experience persistent or severe razor bumps despite following preventive measures and home treatments, it’s advisable to consult a dermatologist. They can offer personalized advice and medical interventions such as prescription creams or laser therapy.

Can lifestyle adjustments help in preventing razor bumps?

Making lifestyle adjustments like wearing loose-fitting clothing and avoiding excessive friction on shaved areas can contribute to reducing the occurrence of razor bumps. Maintaining proper hydration and nutrition also supports overall skin health.

Lower Abdominal Pain: Understanding, Diagnosis & Treatment

0

Feeling discomfort in your lower abdominal area? You’re not alone. Many individuals experience issues related to their lower abdomen, which can be both concerning and disruptive. In this post, we’ll delve into the common causes of lower abdominal discomfort, from digestive problems to reproductive health issues. We’ll also explore practical tips for alleviating these woes and when it’s crucial to seek medical attention.

Understanding what triggers lower abdominal distress is vital for taking proactive steps towards a healthier lifestyle. Whether it’s addressing dietary habits or recognizing symptoms that warrant a visit to the doctor, being informed empowers you to make well-informed decisions about your well-being. Let’s uncover the root causes of lower abdominal discomfort, including twisted bowel and cystitis, and equip ourselves with knowledge on how to address them effectively.

Key Takeaways

  • Understanding the location and characteristics of lower abdominal pain can help in identifying potential causes and seeking appropriate medical attention.
  • Diagnosing the pain through medical evaluation, including physical examination and possibly imaging tests, is crucial for determining the underlying cause of lower abdominal discomfort.
  • Recognizing common conditions such as urinary tract infections, menstrual cramps, and digestive issues can aid in understanding the potential sources of lower abdominal pain.
  • Differentiating between types of lower abdominal pain, such as cramping, sharp, or dull pain, can guide the selection of appropriate treatments and management strategies.
  • Implementing home remedies and self-care measures, such as staying hydrated, maintaining a healthy diet, and managing stress, can help alleviate lower abdominal discomfort and promote overall well-being.
  • Being mindful of bloating and its potential causes, such as dietary factors or underlying health conditions, can inform individuals about effective ways to address and manage bloating.

Understanding Lower Abdominal Pain

Common Causes

Lower abdominal pain can stem from various sources, including inflammation in the abdominal area, digestive system disorders, muscle strain or injury, reproductive system issues, and urinary tract problems. Inflammation in this region may be caused by conditions such as appendicitis or diverticulitis. Digestive system disorders like irritable bowel syndrome (IBS) or inflammatory bowel disease (IBD) can also lead to discomfort in the lower abdomen.

Activities that involve heavy lifting or sudden movements can result in lower abdominal pain in people. Reproductive system issues such as ovarian cysts or endometriosis are common causes of discomfort for females. urinary tract problems like urinary tract infections (UTIs) can also manifest as pain in the lower abdomen.

In some cases, people may experience a combination of these factors leading to more complex symptoms.

Symptoms Overview

The symptoms associated with lower abdominal pain vary depending on the underlying cause. Bloating and discomfort are common complaints among individuals experiencing this type of pain. Changes in bowel habits such as diarrhea or constipation may also occur due to digestive system issues like IBS.

Pain during urination is often indicative of a urinary tract problem while menstrual irregularities could point towards reproductive health concerns for females. Nausea and vomiting might accompany severe cases of lower abdominal pain caused by conditions like appendicitis.

Understanding these symptoms is crucial for identifying potential causes and seeking appropriate medical attention when necessary for people.

Severity Indicators

It’s important to recognize certain indicators that suggest a more serious issue requiring immediate medical intervention when experiencing lower abdominal pain. Persistent and intense pain that does not subside with time should raise concern about potential complications related to inflammation, organ damage, or infection within the abdomen. Fever and chills accompanying lower abdominal pain could indicate an underlying infection that needs prompt treatment. Unexplained weight loss alongside persistent discomfort requires thorough evaluation by a healthcare professional to rule out any serious conditions such as cancer. Severe bloating and distension along with difficulty breathing signal possible complications affecting organs within the abdomen which require urgent medical assessment.

Diagnosing the Pain

Professional Diagnosis

When experiencing lower abdominal pain, seeking a professional diagnosis is crucial. A healthcare provider will conduct a physical examination to assess the location and severity of the pain. They may recommend imaging tests such as ultrasound or CT scan to identify any abnormalities in the abdominal region. Blood and urine tests are also common to check for signs of infection or inflammation that could be causing the pain.

It’s important not to underestimate the value of seeking medical help when dealing with lower abdominal pain. While self-assessment can provide some insight, professional diagnosis offers a comprehensive understanding of the underlying causes.

Location-Specific Causes

The location of lower abdominal pain can often point towards specific causes that need attention and possible treatment options.

Right Quadrant

Pain in the lower right quadrant could indicate appendicitis, especially if it starts as mild discomfort around your belly button before moving to your lower right abdomen. Gallbladder issues such as gallstones or inflammation might also cause severe discomfort in this area. Liver conditions like hepatitis or liver abscesses can result in persistent pain on this side.

Left Quadrant

On the other hand, left-sided lower abdominal pain might signify diverticulitis – an inflammation or infection within small pouches that develop along your colon’s walls. Spleen-related concerns due to trauma or infections could also lead to sharp pains on this side. Colon problems including irritable bowel syndrome (IBS) or colitis may manifest through consistent discomfort in this area.

Understanding these potential causes based on location helps individuals recognize when it’s time to seek medical assistance for their symptoms instead of ignoring them until they worsen.

Self-Assessment Tips

In addition to seeking professional guidance, there are steps individuals can take for self-assessment when experiencing lower abdominal pain:

  • Keeping a symptom journal: This involves noting down details about when and where you experience pain, its intensity, duration, and any accompanying symptoms.
  • Monitoring dietary triggers: Certain foods may exacerbate digestive issues leading to lower abdomen discomfort; keeping track of what you eat can help identify potential triggers.
  • Tracking menstrual cycles (for females): For women experiencing cyclical lower abdomen distress related to menstruation, tracking monthly cycles provides valuable insights into patterns and fluctuations.

Common Conditions and Causes

Digestive Issues

The lower abdominal region can be affected by various digestive issues. Constipation is a common problem that causes infrequent bowel movements, leading to straining during bowel movements and the passing of hard or lumpy stools. This can result in discomfort and pressure in the lower abdomen.

Another condition related to digestive issues is Irritable Bowel Syndrome (IBS), which often leads to lower abdominal discomfort. IBS may cause abdominal pain accompanied by diarrhea or constipation, along with bloating, gas, and the presence of mucus in the stool.

These conditions can lead to significant discomfort in the lower abdomen due to irregular bowel movements and the associated symptoms such as pain, bloating, and gas.

Inflammation Causes

Inflammation-related conditions also contribute to lower abdominal discomfort. One such condition is colitis, characterized by diarrhea containing blood or pus, along with severe abdominal cramps and pain. Individuals experiencing colitis may also feel an urgent need for a bowel movement due to inflammation in the colon.

Appendicitis is another inflammation-related issue that affects the lower abdomen. It typically starts with sudden pain near the navel before moving towards the right side of the lower abdomen. Other symptoms include loss of appetite, nausea, vomiting – all contributing to significant discomfort in this area.

These inflammatory conditions not only cause physical distress but also impact daily activities due to their severity.

Reproductive Cycle Factors

Factors related to an individual’s reproductive cycle can significantly impact their experience of lower abdominal discomfort. Menstrual cramps are a common occurrence among individuals who menstruate; these cramps occur specifically within this region during menstruation causing varying levels of distress.

Additionally,right upper quadrant pain might affect women more than men because it could be related directly or indirectly through pregnancy complications.

Location-Specific Abdominal Pain

Right Upper Quadrant Pain

Lower abdominal pain is often localized to specific areas, such as the right upper quadrant. This type of pain can be caused by conditions related to the gallbladder, liver, or right kidney. When experiencing lower abdominal pain in the right upper quadrant, it’s important to consider potential causes such as gallstones, hepatitis, or a kidney infection.

Pain in the lower abdomen on the right side may also indicate issues with the liver. For instance, liver inflammation (hepatitis) or a blocked bile duct can lead to discomfort in this area. It’s crucial to seek medical attention if you experience persistent or severe stomach pain, especially when accompanied by other symptoms like jaundice (yellowing of skin and eyes), fever, or nausea.

In some cases, abdominal pain in the right upper quadrant might be linked to musculoskeletal issues rather than internal organ problems. Strained muscles or costochondritis (inflammation of cartilage connecting ribs and breastbone) can cause localized discomfort that mimics internal organ-related pains.

Left Lower Quadrant Pain

When discussing lower abdominal pain, focusing on the left lower quadrant is essential for identifying potential causes related to structures like the colon and ovaries. Conditions such as diverticulitis (inflammation of small pouches in the colon), ulcerative colitis, and ovarian cysts are known culprits for causing discomfort in this region.

Diverticulitis occurs when pouches lining your intestines become inflamed due to trapped stool particles; this condition commonly leads to sharp pains on your left side along with bloating and changes in bowel habits. Furthermore, ovarian cysts are fluid-filled sacs that form within an ovary; they can trigger dull aches concentrated on one side of your lower abdomen.

Pelvic vs. Abdominal Pain

Distinguishing between pelvic and abdominal pain is crucial since they originate from different anatomical regions despite their proximity. Pelvic pain typically arises from reproductive organs—such as uterus and ovaries—and surrounding structures like fallopian tubes. On contrary, abdominal discomfort encompasses a broader range including gastrointestinal organs—like stomach and intestines—as well as other vital structures within your belly cavity.

By understanding these distinctions, you’ll be better equipped at pinpointing potential sources behind any lower abdominal distress you might encounter.

Types and Treatments of Lower Abdominal Pain

Acute vs. Chronic Pain

Lower abdominal pain can be categorized into acute or chronic based on the duration and severity of the discomfort. Acute pain is often sudden and intense, caused by a specific injury or illness such as appendicitis or kidney stones. It typically requires immediate medical attention to address the underlying cause and alleviate the symptoms. On the other hand, chronic lower abdominal pain persists over a longer period, usually more than three months, and may be indicative of an ongoing issue such as irritable bowel syndrome (IBS) or endometriosis.

When experiencing acute lower abdominal pain, seeking prompt medical evaluation is crucial to diagnose any serious conditions that require urgent intervention. For example, if someone develops severe lower abdominal pain accompanied by fever and vomiting, it could be a sign of appendicitis requiring surgical removal of the inflamed appendix.

In contrast, chronic lower abdominal pain often necessitates a comprehensive assessment to identify its root cause before initiating targeted treatment. For instance, individuals with chronic pelvic inflammatory disease might need long-term antibiotic therapy alongside lifestyle modifications to manage their symptoms effectively.

Understanding whether the lower abdominal pain is acute or chronic plays a pivotal role in determining appropriate courses of action for alleviating discomfort and addressing potential underlying health issues.

Medications and Therapies

The management of lower abdominal pain frequently involves various medications and therapeutic approaches tailored to each patient’s specific condition. Over-the-counter medications like acetaminophen (Tylenol) can help relieve mild lower abdominal discomfort resulting from menstrual cramps or muscle strain.

Prescription medications are also commonly used for treating different causes of lower abdominal pain; for example:

  • Antibiotics are prescribed for bacterial infections causing pelvic inflammatory disease.
  • Antispasmodic drugs may be recommended for individuals with IBS-related lower abdominal cramping.
  • Hormonal therapies are utilized in cases where gynecological conditions like endometriosis contribute to persistent pelvic discomfort.

Non-pharmacological interventions such as physical therapy exercises targeting core muscles can provide significant relief from chronic musculoskeletal causes of lower abdomen soreness. Similarly, relaxation techniques like deep breathing exercises or meditation might help reduce stress-induced gastrointestinal disturbances leading to recurrent stomach ache.

Surgical Interventions

In some instances where conservative treatments fail to adequately address severe or persistent sources of lower abdominal distress, surgical interventions become necessary options for resolving underlying anatomical abnormalities or eliminating pathological conditions contributing to debilitating symptoms:

  1. Appendectomy: Surgically removing an inflamed appendix due to appendicitis.
  2. Laparoscopic surgery: Minimally invasive procedures performed to diagnose and treat conditions affecting organs within the pelvis through small incisions. 3.Hysterectomy: Removal of uterus in cases involving severe uterine fibroids, endometriosis-associated complications, or certain types of gynecological cancers.

While surgical interventions carry inherent risks, such as infection or bleeding, they remain essential components in managing substantial sources of prolonged suffering stemming from diverse etiologies associated with lower abdominal agony.

Home Remedies and Self-Care

Lifestyle Modifications

Making certain lifestyle changes can significantly help alleviate lower abdominal pain. Firstly, maintaining a healthy diet is crucial. Eating a balanced diet rich in fiber can aid in preventing constipation, which often contributes to lower abdominal discomfort. Consuming plenty of water throughout the day helps keep the digestive system functioning smoothly.

Regular exercise also plays a pivotal role in managing lower abdominal pain. Engaging in physical activities such as walking, swimming, or yoga not only promotes better digestion but also reduces stress levels that could exacerbate abdominal discomfort.

Moreover, managing stress through relaxation techniques like deep breathing exercises or meditation can be beneficial for individuals experiencing lower abdominal pain due to high-stress levels. Stress management is essential as it can directly impact gastrointestinal health and contribute to symptoms such as bloating and cramping.

Natural Remedies

Several natural remedies have been found effective in alleviating lower abdominal pain without the need for medication. For instance, applying a warm compress to the affected area can provide relief by relaxing muscles and reducing tension. This simple remedy is particularly helpful for menstrual cramps or muscle strain causing the discomfort.

Furthermore, herbal teas containing ingredients like peppermint or ginger are known for their soothing properties on the digestive system and may help ease lower abdominal pain caused by gas or indigestion. These natural remedies offer gentle yet effective relief from common causes of lower abdominal discomfort.

In addition to this, aromatherapy using essential oils such as lavender or chamomile has shown promise in reducing overall body tension and promoting relaxation, potentially easing lower abdomen-related pains caused by muscular tension or stress.

Preventive Measures

Taking proactive steps to prevent recurrent episodes of lower abdominal pain is essential for long-term well-being. One key preventive measure involves being mindful of food triggers that may exacerbate symptoms; individuals should identify specific foods that tend to cause gastrointestinal distress and consider eliminating them from their diet.

Another vital preventive measure entails maintaining good posture during daily activities as poor posture can lead to muscle strain contributing to lower abdomen discomfort over time. Simple adjustments like sitting with proper back support and avoiding prolonged periods of slouching can make a significant difference.

Moreover, practicing good hygiene habits such as regular hand-washing before meals helps reduce the risk of ingesting harmful bacteria that could lead to stomach infections causing lower abdomen issues.

Treating and Managing Bloating

Dietary Adjustments

Making dietary adjustments can play a significant role in managing lower abdominal bloating. One of the most effective ways to reduce bloating is to avoid foods that are known to cause gas and discomfort. These include foods high in sodium, such as processed and canned goods, which can lead to water retention and bloating. Reducing intake of carbonated beverages like soda or beer can help minimize bloating. Instead, opt for hydrating with plain water or herbal teas.

Moreover, incorporating more fiber-rich foods into your diet can aid in digestion and prevent constipation, which often contributes to abdominal bloating. Foods such as fruits, vegetables, whole grains, nuts, and seeds are excellent sources of fiber that promote regular bowel movements and alleviate bloating symptoms. It’s essential to introduce these dietary changes gradually to allow your body time to adjust without causing additional discomfort.

Another important aspect of dietary adjustments involves paying attention to portion sizes during meals. Overeating can put extra pressure on the stomach and intestines, leading to increased bloating. Consuming smaller portions at regular intervals throughout the day rather than large meals can help prevent overloading the digestive system.

Over-the-Counter Solutions

In some cases where home remedies and dietary changes may not provide sufficient relief from lower abdominal bloating, individuals may consider utilizing over-the-counter solutions specifically designed for addressing gastrointestinal discomfort. For instance, taking digestive enzymes supplements before meals may assist in breaking down food more efficiently within the digestive tract.

Simethicone-based products are another popular option for alleviating gas-related symptoms associated with abdominal bloating by helping break up gas bubbles in the gut. Additionally, antacids containing ingredients like calcium carbonate or magnesium hydroxide may help neutralize stomach acid levels, reducing feelings of fullness or discomfort caused by excess gas accumulation.

It’s crucial for individuals considering over-the-counter solutions for managing lower abdominal bloating symptoms to consult a healthcare professional prior to using any new medications or supplements. This ensures that they are suitable based on individual health conditions and do not interact negatively with any existing medications being taken.

Addressing Specific Conditions

Kidney Infection Treatment

Kidney infections can cause lower abdominal pain and discomfort. It’s crucial to seek medical attention promptly if you suspect a kidney infection. The treatment typically involves a course of antibiotics prescribed by a healthcare professional. These medications are essential in eliminating the bacteria causing the infection, which can alleviate the symptoms, including lower abdominal pain.

In some cases, individuals with kidney infections may require hospitalization for intravenous antibiotics or further evaluation and management. It’s important to stay well-hydrated during treatment to support the body’s healing process. Drinking plenty of water helps flush out bacteria from the urinary system, aiding in recovery.

If left untreated, kidney infections can lead to more severe complications; therefore, seeking timely medical intervention is crucial when experiencing persistent lower abdominal discomfort associated with this condition.

Managing Trapped Gas

Trapped gas in the digestive system can result in uncomfortable sensations and lower abdominal bloating. To manage trapped gas effectively, various lifestyle adjustments and home remedies can be beneficial. Engaging in regular physical activity such as walking or gentle yoga exercises can help stimulate digestion and reduce gas buildup.

Moreover, consuming gas-relieving foods like peppermint tea or ginger may provide relief from trapped gas-related lower abdominal discomfort. Over-the-counter medications designed to alleviate gas symptoms could also be helpful when used according to their instructions.

Furthermore, practicing mindful eating habits such as chewing food slowly and avoiding carbonated beverages might aid in preventing excessive gas buildup within the digestive tract.

Relieving Constipation

Constipation often leads to straining during bowel movements and subsequent lower abdominal pain due to increased pressure on the intestines. To relieve constipation effectively, incorporating fiber-rich foods into one’s diet is key. Eating fruits like apples or pears along with vegetables such as broccoli or carrots promotes healthy digestion and softens stool consistency.

Additionally, staying adequately hydrated supports proper bowel function, helping prevent constipation-related lower abdominal discomfort. Regular physical activity also plays a significant role in promoting regular bowel movements, alleviating constipation symptoms.

Over-the-counter laxatives may offer short-term relief; however, it’s essential not to rely on them excessively without consulting a healthcare professional.

Special Considerations in Pain Management

Age is a crucial consideration. As people age, the body undergoes natural changes that can impact how pain is experienced and managed. Older adults may have a higher likelihood of experiencing lower abdominal pain due to conditions such as constipation, diverticulitis, or urinary tract infections.

Elderly individuals often experience reduced muscle mass and strength in the abdomen, which can contribute to discomfort or pain in the lower abdominal region. Age-related conditions like diverticular disease are more prevalent in older adults and can lead to persistent lower abdominal pain.

Furthermore, older adults may be taking multiple medications for various health issues. This polypharmacy can increase the risk of drug interactions or adverse effects leading to lower abdominal discomfort. Therefore, healthcare providers must consider these factors when developing a comprehensive plan for managing lower abdominal pain in elderly patients.

Chronic Conditions Impact

Chronic medical conditions play a significant role in lower abdominal pain management. For instance:

  • Diverticular Disease

Diverticular disease is one of the common chronic conditions affecting the colon and causing lower abdominal discomfort. Individuals with this condition develop small bulges or pouches (diverticula) in their colon wall that can become inflamed or infected.

The presence of diverticula increases the risk of developing diverticulitis – an inflammation or infection of these pouches leading to severe tenderness and localized abdominal pain primarily on the left side but also across other areas.

When managing lower abdominal pain associated with diverticular disease, healthcare professionals need to focus on dietary modifications such as increasing fiber intake and avoiding certain foods like nuts and seeds that could exacerbate symptoms.

  • Nephrolithiasis

Nephrolithiasis refers to kidney stones which are solid deposits made up of minerals and salts that form inside your kidneys. These stones can cause excruciating intermittent spasms as they move through the urinary tract system.

In cases where nephrolithiasis causes referred pain, meaning it starts from one location then moves elsewhere (e.g., from back/flank area down towards groin), effective management involves addressing both acute episodes through medication for controlling spasm-induced agony while also focusing on long-term prevention strategies including increased fluid intake.

When to Seek Medical Attention

Warning Signs

If you experience persistent lower abdominal pain that doesn’t subside after a few days, it may be a warning sign of an underlying medical condition. Other warning signs include severe cramping, bloating, and discomfort during urination or bowel movements. If the pain is accompanied by abnormal vaginal bleeding or discharge, it’s crucial to seek medical attention promptly.

Ignoring these warning signs can lead to complications and delay proper diagnosis and treatment. If left untreated, conditions such as appendicitis, ovarian cysts, pelvic inflammatory disease (PID), or endometriosis can worsen and cause further damage to your reproductive system. Therefore, seeking prompt medical attention when experiencing any of these lower abdominal warning signs is essential for maintaining your overall health.

It’s important not to dismiss any unusual symptoms in the lower abdomen as they could indicate serious health issues that require immediate medical evaluation. Any sudden onset of severe pain in the lower abdomen should never be ignored because it might signify a life-threatening emergency.

Emergency Symptoms

Certain symptoms related to lower abdominal pain warrant immediate emergency care. These include sharp and intense pain that suddenly develops in the lower abdomen without an apparent cause or fluctuates in intensity rapidly. This kind of excruciating pain may signal an emergency situation such as an ectopic pregnancy or a ruptured organ like the appendix.

If you experience accompanying symptoms such as dizziness, fainting spells, profuse sweating with cold clammy skin, rapid heartbeat or difficulty breathing along with severe lower abdominal pain; don’t hesitate – seek urgent medical help right away.

Furthermore,

  • Severe trauma to the lower abdomen from accidents or falls necessitates immediate assessment at an emergency room.
  • Sudden onset of extreme tenderness in the lower abdomen upon touch should also prompt seeking urgent care.
  • Inability to pass urine despite feeling a strong urge along with intense lower abdominal discomfort requires swift medical attention.

Prevention Strategies for Lower Abdominal Pain

Healthy Eating Habits

Maintaining healthy eating habits is crucial in preventing lower abdominal pain. Consuming a balanced diet rich in fiber, fruits, vegetables, and whole grains can promote proper digestion and prevent constipation, which often leads to lower abdominal discomfort. Staying hydrated by drinking plenty of water throughout the day aids in smooth bowel movements and reduces the risk of gastrointestinal issues. Avoiding excessive consumption of fatty foods and spicy meals can also contribute to preventing digestive disturbances that may cause lower abdominal pain.

Adopting smaller, more frequent meals instead of large portions helps regulate digestion and minimizes bloating or discomfort. For example, rather than having three large meals a day, individuals can opt for five smaller meals to keep their digestive system functioning optimally without overloading it at any given time.

Incorporating probiotics into one’s diet is another beneficial strategy for maintaining a healthy gut. Probiotics are naturally found in fermented foods such as yogurt, kefir, sauerkraut, and kimchi. These foods help balance the gut microbiota and support overall digestive health while reducing the likelihood of experiencing lower abdominal pain due to imbalances in the gut flora.

Regular Exercise Routine

Engaging in a regular exercise routine plays a significant role in preventing lower abdominal pain by promoting overall physical well-being. Physical activity stimulates bowel regularity by enhancing intestinal muscle contractions that aid in moving waste through the digestive tract efficiently. Simple exercises like walking or jogging can facilitate smoother digestion and reduce the chances of developing constipation-related discomfort.

Furthermore, targeted exercises that focus on strengthening the core muscles provide stability to the abdomen and pelvic region, thereby reducing strain on these areas during daily activities. Core-strengthening workouts such as planks, bridges, leg raises, or yoga poses like boat pose help maintain good posture and alleviate pressure from the lower abdomen.

Regular exercise also contributes to stress reduction by triggering endorphin release – natural mood-enhancing chemicals – which positively impacts mental well-being while minimizing emotional stressors known to exacerbate gastrointestinal symptoms leading to lower abdominal pain.

Stress Reduction Techniques

Implementing effective stress reduction techniques is essential for mitigating factors contributing to lower abdominal discomfort caused by psychological distress. Practices such as deep breathing exercises help calm both body and mind when feeling overwhelmed or anxious. By taking slow deep breaths from your diaphragm instead of shallow chest breathing you signal your body’s relaxation response which reduces tension within your abdomen alleviating potential sources of discomfort there too.

Moreover practicing mindfulness techniques like meditation or yoga encourages present-moment awareness while fostering mental clarity; this enables individuals better manage stressful situations thus avoiding negative impact on their physical health including their abdomens.

Summary

Understanding the causes and types of lower abdominal pain is crucial for effective self-care and seeking appropriate medical attention. Whether it’s sharp, dull, or cramp-like pain, knowing when to address it can prevent serious complications. From bloating to specific conditions like appendicitis or ovarian cysts, recognizing the symptoms and implementing prevention strategies is key. Remember, your body communicates with you through pain, so don’t ignore persistent discomfort. Always consult a healthcare professional if you’re uncertain about your symptoms.

Take charge of your well-being by staying informed and proactive in managing lower abdominal pain. Educate yourself about potential conditions, prioritize preventive measures, and seek timely medical advice when needed. Your health is a priority, so listen to what your body tells you and take the necessary steps to ensure your overall well-being.

Frequently Asked Questions

What are the common causes of lower abdominal pain?

Lower abdominal pain can be caused by various factors such as menstrual cramps, urinary tract infections, or gastrointestinal issues like constipation. It’s essential to consult a healthcare professional for an accurate diagnosis.

How can I manage bloating in the lower abdomen?

To manage bloating in the lower abdomen, try avoiding gas-producing foods, practicing regular physical activity, and consuming probiotics. Staying hydrated and eating smaller meals can help alleviate discomfort.

When should I seek medical attention for lower abdominal pain?

Seek medical attention if you experience severe or persistent lower abdominal pain accompanied by symptoms like fever, vomiting, or blood in your stool. Sudden and intense pain also warrants immediate medical evaluation.

What home remedies can help relieve lower abdominal pain?

Home remedies such as applying a heating pad to the area, gentle exercise like walking or yoga stretches, and herbal teas with anti-inflammatory properties may provide relief from mild lower abdominal discomfort.

Are there specific prevention strategies for lowering the risk of experiencing lower abdominal pain?

Maintaining a balanced diet rich in fiber and staying adequately hydrated are key preventive measures. Regular exercise and stress management techniques also play crucial roles in reducing the risk of developing lower abdominal discomfort.

Unraveling the Mystical Threads of How Our Past Lives Influence Today’s Journey

0

Embarking on a journey through the realms of mind, body, and spirit, we often find ourselves entangled in the profound mystery of our existence. Among these enigmas is the concept of past lives and their subtle yet significant impact on our present. This exploration isn’t just about unraveling the mysteries of reincarnation; it’s about understanding how these echoes from our past shape our current reality. For the free-spirited and the truth-seekers, this guide offers a deep dive into the unseen influences of our former selves.

The Soul’s Eternal Journey & Understanding Past Lives

Our existence extends beyond the physical confines of the current lifetime. An eternal traveler, the soul carries experiences and lessons from life to life. This notion isn’t just a spiritual fancy; it’s an invitation to view life as a continuum. Each incarnation is a chapter in the soul’s evolving story, contributing to the growth and enlightenment we seek. Understanding this eternal journey provides context to our current experiences, shaping our perceptions, relationships, and life choices.

Echoes of the Past & How Previous Experiences Shape Current Realities

As we navigate through our present existence, we often encounter situations that inexplicably resonate with us. These are not mere coincidences but echoes of past experiences. Our previous lives leave an imprint on our souls, influencing our fears, desires, and even talents. This phenomenon can be likened to an autobiography of trauma, where our past pains and pleasures silently script our current narrative. Recognizing these echoes allows us to address unresolved issues and embrace the wisdom they offer.

Karmic Connections – Understanding Relationships Through Past Life Lenses

Have you ever met someone and instantly felt a deep connection or, conversely, an unexplainable aversion? These intense reactions may stem from relationships forged in past lives. Our souls are entwined with others, journeying together through various lifetimes. These karmic connections often re-emerge to teach us lessons, balance past actions, or continue unfinished stories. Understanding these connections offers a profound perspective on our interactions and relationships, allowing us to navigate them with greater awareness and compassion.

The Shadow of Substance & Past Lives and the Cycle of Addiction

In the tapestry of past lives, the threads of substance abuse often stand out, carrying a significant impact on our present existence. Addiction, viewed through the lens of past life experiences, can be seen as a recurring challenge, a lesson unlearned, or a coping mechanism carried over from a previous existence. The struggle with addiction in our current life might be a reflection of unresolved issues or traumas from past lives. Recognizing this can be a powerful tool in addressing addiction. It’s not just about treating the symptoms; it’s about understanding the root causes that transcend time. This perspective can be especially enlightening in environments like a women recovery center, where the journey of healing and self-discovery can benefit immensely from the wisdom of past life experiences.

Healing the Past, Empowering the Present

Understanding the influence of past lives isn’t just an exercise in spiritual curiosity; it’s a path to healing and self-empowerment. When we acknowledge the experiences and lessons of our past selves, we open the door to healing deep-seated wounds. This process involves recognizing the patterns and influences from our past lives and actively working to resolve them. Techniques like past life regression therapy, meditation, and reflective introspection can be valuable tools in this healing journey. By confronting and healing our past, we unlock a greater potential for growth, happiness, and fulfillment in our present life.

The Path Forward – Integrating Past Life Wisdom into Our Daily Lives

The ultimate goal of understanding our past lives is to integrate this wisdom into our daily existence. It’s about living more consciously, making choices that reflect our current desires and needs and the lessons and growth our soul seeks. This integration involves a balance between acknowledging the influence of our past lives and not becoming trapped by them. It’s about using this knowledge to enhance self-awareness, guide decisions, and foster spiritual growth. In doing so, we honor our soul’s journey and contribute to a more enlightened, compassionate, and harmonious world.

Exploring past lives and their impact on our present existence is more than just a spiritual adventure; it’s a journey of self-discovery and transformation. By understanding and embracing the echoes of our past selves, we gain invaluable insights into our current life’s challenges, relationships, and purpose. This knowledge empowers us to heal, grow, and evolve as individuals and as interconnected souls on an eternal journey. This journey is about finding oneself and contributing to the collective consciousness in a meaningful, enlightened way.